Configure Network Controls
A VNet-integrated agent with outbound traffic routed through your network, managed path toggles configured for your environment, and verified connectivity to private endpoints. Learn more → Network Controls.
Prerequisites
- An SRE Agent in Running state
- An Azure Virtual Network with a subnet that is /27 or larger
- The subnet must be delegated to
Microsoft.App/environments - Network Contributor role (or equivalent with
Microsoft.Network/virtualNetworks/subnets/join/action) on the target subnet - You must have the SRE Agent Administrator role on the agent resource
Step 1: Open workspace configuration
- Open your agent in the Azure portal.
- In the left navigation, select Settings > Workspace configuration.
- Select the Networking tab.
Step 2: Select an egress mode
Choose the mode that matches your security requirements:
- Unrestricted — Allow all outbound traffic (default)
- Limited — Deny all, allow listed hosts
- Azure VNet — Private egress via your VNet
Select Azure VNet to route agent traffic through your network.
Once a VNet is connected, the Unrestricted and Limited mode cards are disabled. To switch egress modes, you must disconnect the VNet first.
Step 3: Connect your VNet
- Select Browse subnets... to open the subnet picker dialog.
- In the dialog, select your Subscription, Resource group, Virtual network, and Subnet from the cascading dropdowns. The subnet must be /27 or larger and delegated to
Microsoft.App/environments. - Select Connect. The Use VNet's private DNS option is enabled automatically — this lets the agent resolve private endpoint hostnames (e.g., Log Analytics workspaces behind AMPLS).
For private endpoint resolution to work, link the relevant Azure Private DNS zones to your VNet (e.g., privatelink.ods.opinsights.azure.com for Log Analytics, privatelink.vaultcore.azure.net for Key Vault). If DNS is not configured, the agent may fall back to public endpoints or fail to connect.
Once connected, you cannot change the subnet without disconnecting and reconnecting the VNet.
Step 4: Configure managed path toggles
Under On the infra network, decide which public service categories route through the managed path instead of your VNet.
| Toggle | What it controls |
|---|---|
| Remote MCP server access | MCP server traffic |
| Package registries | PyPI, npmjs, NuGet.org, Ubuntu apt (each is an independent toggle) |
| Code repositories | GitHub, GitHub Enterprise, Azure DevOps (each is an independent toggle) |
| Additional hosts | Custom hostnames or wildcard patterns |
Start with the categories your agent needs enabled on the managed path. You can tighten these later as your network adopts FQDN-based egress filtering.
Step 5: Save and verify
- Select Save.
- The Azure VNet card displays a Connected badge confirming the agent is routed through your VNet.
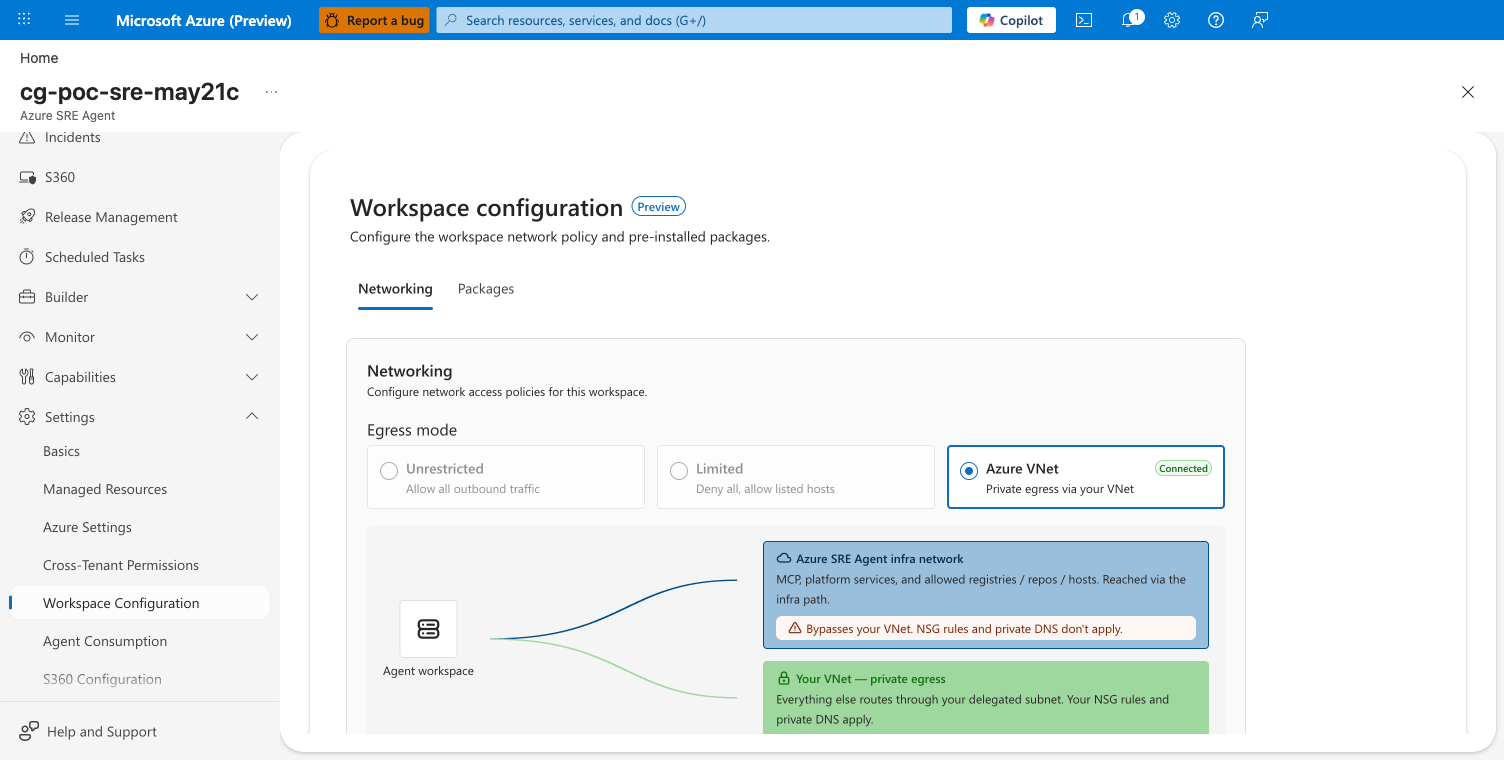
- Test by asking the agent to query a resource behind a private endpoint (for example, a Log Analytics workspace with public access disabled). If the query succeeds, VNet routing is working.
Next steps
- Network Controls — understand the two traffic paths and the security team routing table
- Network Requirements — firewall allowlist and required domains
- Audit Agent Actions — track what the agent does with its network access