Share Files and Screenshots in Chat
An agent that analyzes uploaded files — from screenshots to runbooks to config files — directly in chat. You'll practice all three upload methods: file picker, drag and drop, and clipboard paste. Learn more → File attachments. Time: ~5 minutes.
Prerequisites
- An Azure SRE Agent in Running state
- A test image file (any screenshot or PNG/JPG) and a test text file (.txt, .md, .json, or .log)
Step 1: Attach a file using the file picker
- Click New chat thread in the left sidebar.
- Click the + (plus) button next to the message input.
- Select Attach file from the menu.
- In the file dialog, choose a text file — such as a runbook, config file, or log file.
- The file appears as a pill below the message input, showing a document icon, the file name, and size.

Checkpoint: The attachment pill appears with the file name and size. An X button lets you remove it before sending.
Step 2: Ask the agent to analyze the file
-
With the file attached, type a question. For example, if you uploaded a runbook:
I uploaded our production runbook. If I see 500 errors with "Connection refused to database", what should I do?
-
Click Send.
-
Your message appears with a file card showing the file name, size, and a download arrow.
-
The agent reads the file, identifies the relevant section, and responds with structured guidance.
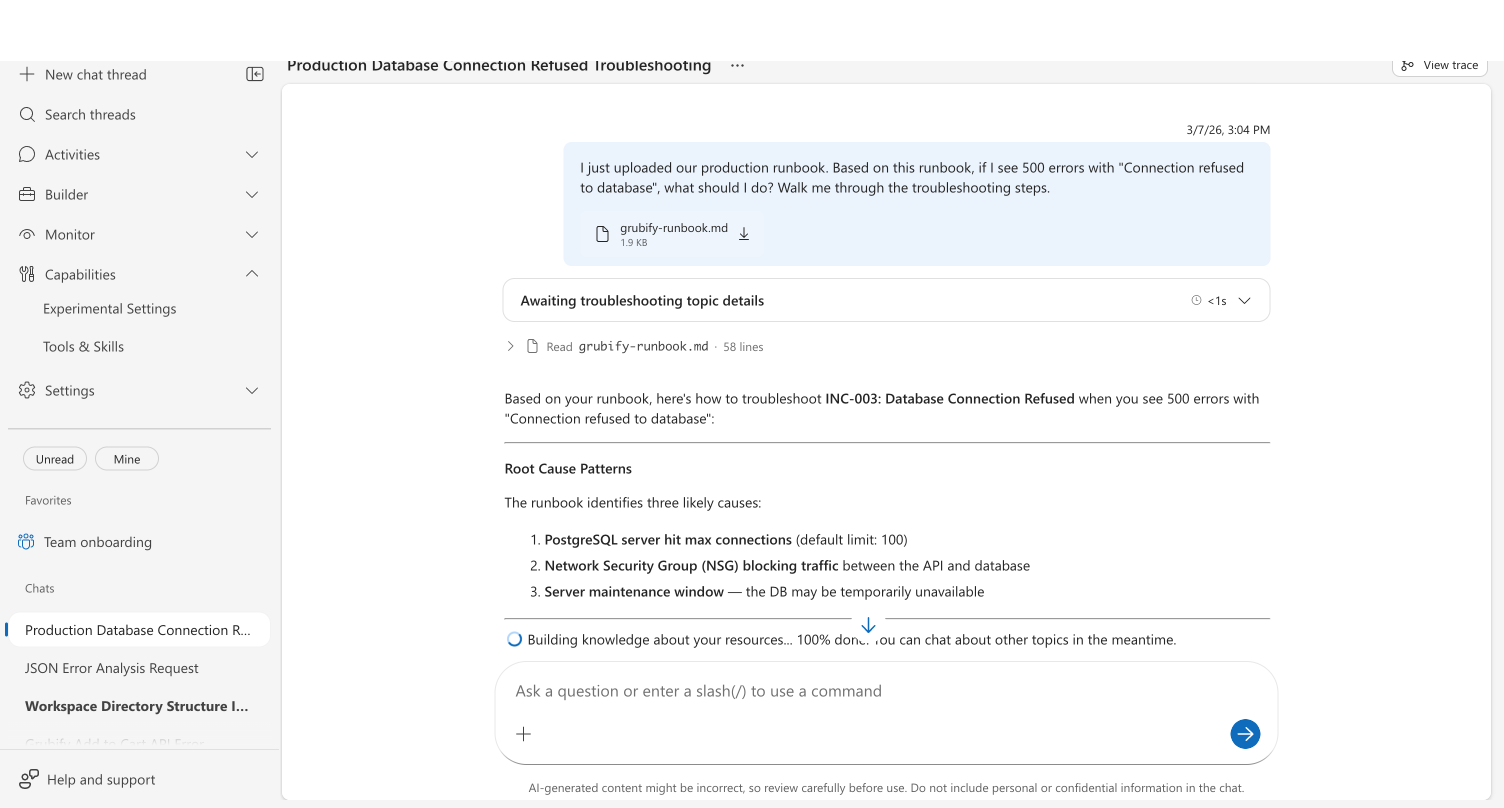
Checkpoint: The agent references specific content from your file. For a runbook, it identifies the matching incident and walks through the mitigation steps. For a log file, it identifies errors and patterns.
Step 3: Drag and drop a file
- Find a file on your desktop — a
.json,.yaml, or.logfile works well. - Drag it onto the chat area.
- A semi-transparent overlay appears with an upload arrow icon, confirming the drop target.
- Release the file. The overlay disappears and an attachment pill appears.
- Type your question and send.
Checkpoint: The agent reads the file and provides relevant analysis.
Step 4: Paste a screenshot from your clipboard
- Take a screenshot on your machine:
- macOS: Cmd + Shift + 4, then select an area
- Windows: Win + Shift + S, then select an area
- Click in the chat message input.
- Paste with Cmd+V (macOS) or Ctrl+V (Windows).
- The screenshot appears as an attachment pill.
- Type a question like "What do you see in this screenshot?" and send.
Checkpoint: The agent describes the contents of your screenshot using multimodal vision analysis. It can identify charts, error messages, UI elements, and text in images.
Clipboard paste only captures images. Pasting text from a text editor works normally — it is entered as text in the chat input, not attached as a file.
What you learned
- Three upload methods: file picker (+ button), drag and drop, clipboard paste
- Images are analyzed using multimodal vision — the agent sees what you see
- Text and code files are read by the agent using workspace file tools
- Binary documents (PDF, DOCX, PPTX) are processed using Python tools
- Uploaded files persist in the thread and can be downloaded from sent messages
- To save an attached file permanently, ask your agent: "Save this to knowledge settings" — this stores a copy in Knowledge settings where it’s indexed and searchable across all future conversations
Next steps
- File attachments capability → Value proposition and how the agent processes different file types
- Upload Knowledge Documents → How to save documents permanently to Knowledge settings
- Connect Knowledge → Overview of all knowledge sources