Set Up Outlook Connector
An authenticated connection to your Outlook account so your agent can send emails, reply to threads, and read your inbox. Learn more → Send Notifications. Time: ~5 minutes.
Prerequisites
- An agent created in the Azure SRE Agent portal
- A Microsoft 365 account with Outlook access
- SRE Agent Administrator role on the agent (auto-granted to the agent's creator; required for anyone else to manage connectors). See User roles.
- Owner role on the agent's resource group.
- A managed identity configured on the agent
Step 1: Navigate to Connectors
- Open your agent in the Azure SRE Agent portal
- In the left sidebar, expand Builder
- Select Connectors
You'll see the connectors list showing any existing connectors for your agent.
Step 2: Add an Outlook connector
- Click Add connector in the toolbar
- In the connector picker, select Outlook Tools (Office 365 Outlook)
- Click Next
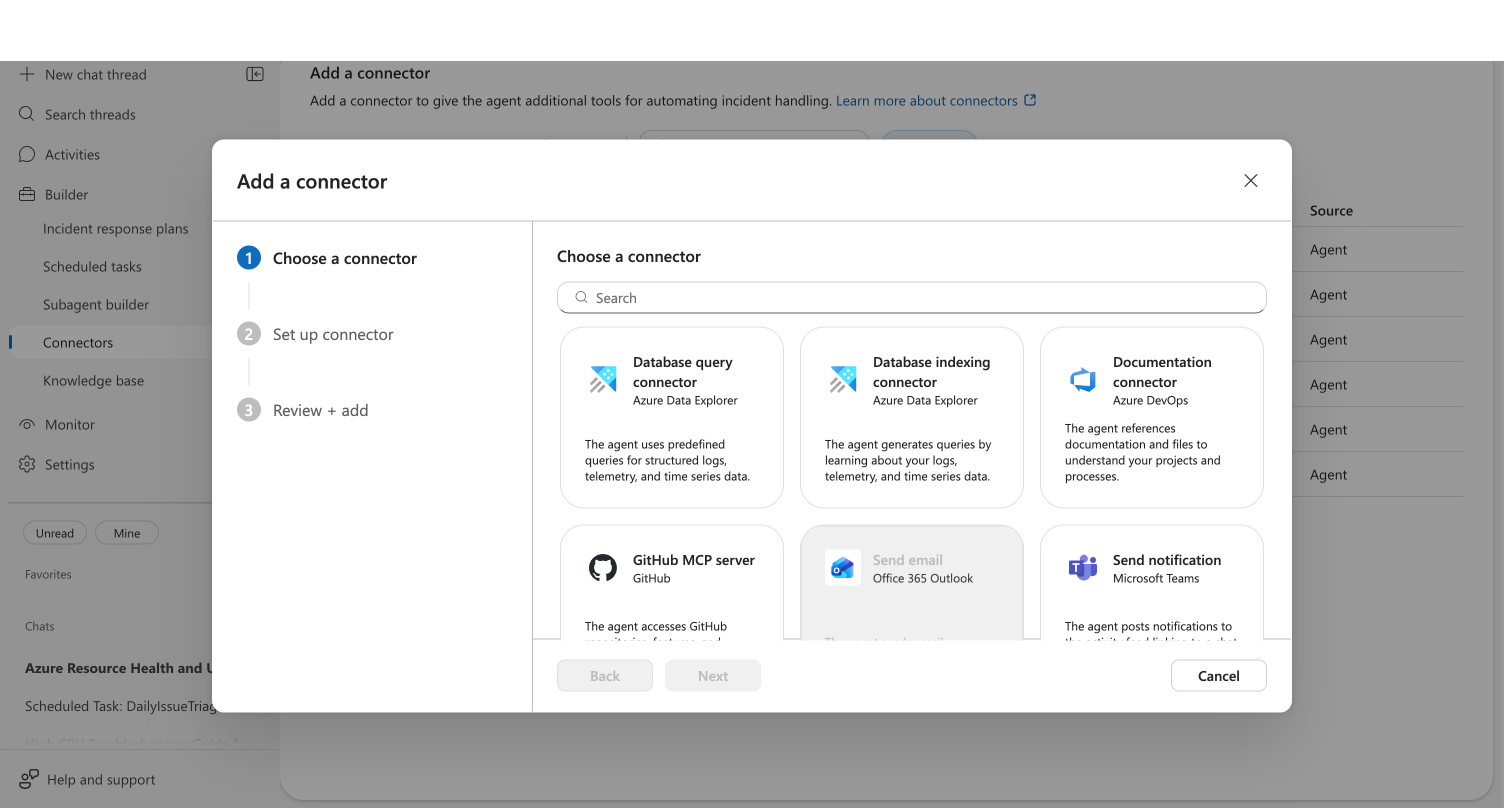
Your agent can have one Outlook connector at a time. If a connector already exists, the card is disabled with the message "Your agent can only have one Outlook connector." To change the connected account, edit the existing connector.
Step 3: Sign in to Outlook
The setup form shows your connector name (auto-generated) and the sign-in option.
- Wait for the permission check to complete — you'll see "Checking permissions..." briefly
- Click Sign in to Outlook
- Complete the OAuth authentication in the popup window
- On success, you'll see a Connected as card showing your email address with a green checkmark
If the authentication dialog doesn't appear, check that your browser isn't blocking popups from sre.azure.com.
Checkpoint: The "Connected as" card shows your email address with a green checkmark. If you see a permissions warning instead, verify you have Owner on the resource group — the warning includes a link to the Azure IAM settings.
Click Sign in with a different account below the connected card to re-authenticate with a different Microsoft account. This disconnects the current account and starts a new OAuth flow.
Step 4: Select managed identity
- OAuth sign-in authorizes the agent to use your Outlook account (send and read emails)
- Managed identity lets the agent securely access the connector at runtime through Azure Resource Manager
- From the Managed identity dropdown, select an identity:
- System assigned — simplest option. Automatically created with your agent and tied to its lifecycle. Use this if you don't need to share the identity across multiple resources.
- User assigned — an independent Azure resource you manage separately. Use this if you share identities across services or need the identity to persist independently of the agent.
- If no identities appear, click Add identity below the dropdown to configure one in the Azure portal.
Step 5: Review and add
- Click Next to proceed to the Review + add step
- Verify your connector details
- Click Add connector to create the connector
Checkpoint: A toast notification confirms the connector was created successfully. Your connector appears in the connectors list.
Step 6: Test your Outlook connector
Ask your agent to send a test email:
Send an email to [your-email] with subject "SRE Agent Test" and body "Outlook connector is working"
Your agent composes the email, formats it as HTML, and sends it through the connected Outlook account.
Checkpoint: The agent shows a tool card confirming the email was sent. Check your inbox to verify receipt.
Edit or remove the connector
Edit
- In the connectors list, click the ⋯ (more actions) menu on the Outlook connector row
- Select Edit connector
- The edit dialog opens — you can re-authenticate with a different account or change the managed identity
- Click Save
Delete
- Click ⋯ on the connector row → Delete connector, or select the checkbox and click Remove in the toolbar
- Confirm the deletion
After deleting, your agent can no longer send or read emails. You can add a new Outlook connector at any time.
What you learned
- How to add an Outlook connector using OAuth sign-in
- How to verify the connector by sending a test email
- What email tools become available to your agent
Troubleshooting
| Issue | Solution |
|---|---|
| Permissions warning appears | Grant Owner on the resource group. Click the link in the warning to open Azure IAM settings. |
| OAuth popup blocked | Allow popups from sre.azure.com in your browser settings |
| OAuth sign-in fails | Ensure your Microsoft 365 account has an active Outlook mailbox |
| No managed identities in dropdown | Click Add identity to configure one in the Azure portal, then click the refresh button |
| Connector card disabled | You already have an Outlook connector. Edit the existing one or delete it first |
Related
| Resource | What you'll learn |
|---|---|
| Send Notifications → | How your agent uses Outlook and Teams for contextual notifications |
| Set Up Teams Connector → | Connect Teams for channel notifications |
| Create a Scheduled Task → | Automate email notifications on a schedule |