Step 1: Create Your Agent
5 min · Deploy your agent and grant it access to your Azure resources.
What you'll accomplish
By the end of this step, your agent will:
- Be deployed in your Azure subscription
- Have access to any resources you granted during setup (you can add more later)
- Be ready to answer questions about your infrastructure
Prerequisites
| Requirement | Details |
|---|---|
| Azure subscription | Active subscription with the Microsoft.App resource provider registered |
| Permissions | Owner or User Access Administrator role on the subscription (needed to assign RBAC roles to the agent's managed identity) |
| Resource group | Existing or create one during setup |
| Network access | *.azuresre.ai must be allowed through your firewall — see Network Requirements |
| Region | Your subscription must allow resource creation in Sweden Central, East US 2, or Australia East |
If the Create button is unavailable or deployment fails with "DeploymentNotFound", register the resource provider:
az provider register --namespace "Microsoft.App"
Then try creating the agent again.
Step 1: Open the creation wizard
-
Go to sre.azure.com.
If you're not signed in, you'll see the landing page — an overview of SRE Agent capabilities with sample demos and getting-started resources. Click Sign In to proceed.
-
After signing in, click Create agent.

Step 2: Configure basics
Fill in the required fields:
| Field | What to enter |
|---|---|
| Subscription | Your Azure subscription |
| Resource group | Choose existing or create new |
| Agent name | Descriptive name (e.g., prod-monitoring) |
| Region | Sweden Central, East US 2, or Australia East |
| Application Insights | Create new (recommended) |
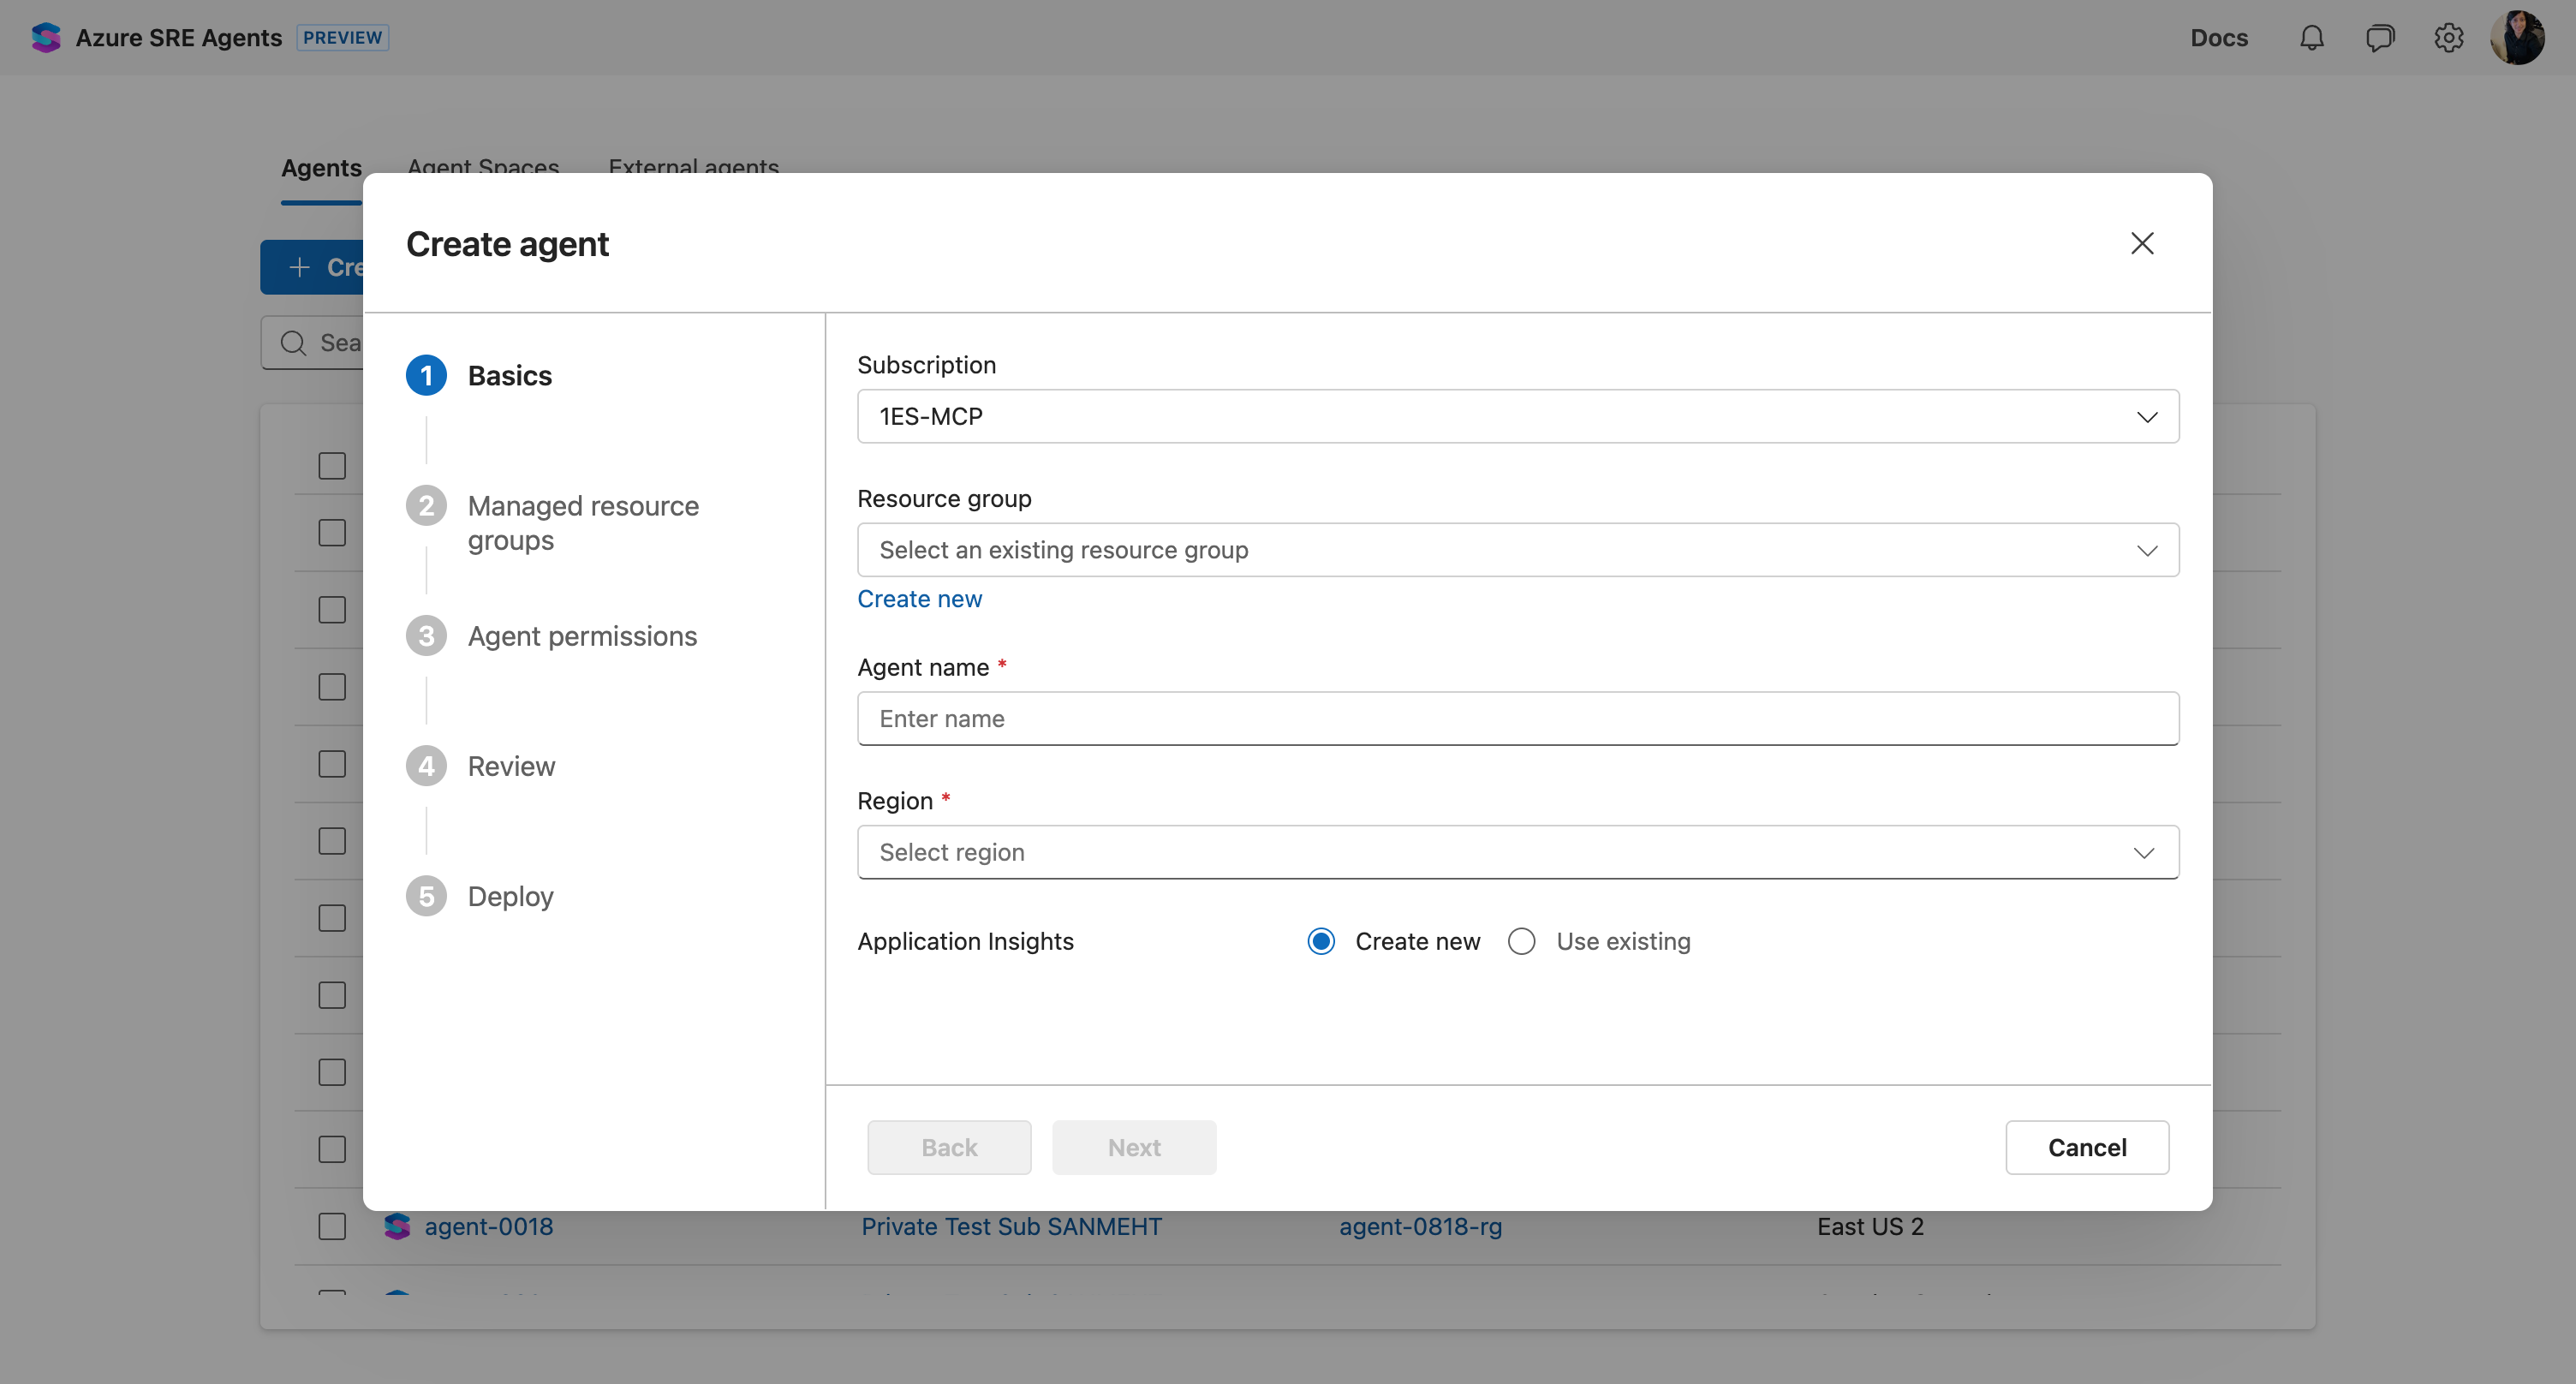
Click Next.
Step 3: Select resource groups to monitor (optional)
Choose which Azure resources your agent can access. This step is optional—you can skip it and grant access later (see Alternative: Subscription-level access below).
You need Owner or User Access Administrator permissions on any resource groups you want to assign to the agent.
- Select resource groups containing your apps, databases, or infrastructure.
- Use filters to find specific groups across subscriptions.
- Select multiple resource groups as needed.
The agent gets read access to resources in these groups—logs, metrics, configurations. It cannot make changes unless you grant Privileged permissions later.
Select 1-2 resource groups to start, or skip this step entirely. You can add more resources later from Settings → Managed resources.
Click Next.
Step 4: Choose permission level
This step sets the permission level for the managed resource groups you selected. If you skipped Step 3, these permissions won't apply to anything yet—but you'll still need to complete this step.
| Level | What it means | When to use |
|---|---|---|
| Reader (recommended) | Agent can read only. Actions require your approval. | Start here—safest option |
| Privileged | Agent can execute approved actions directly. | After you trust the agent |
The wizard shows which Azure RBAC roles will be assigned (Log Analytics Reader, Monitoring Reader, AKS Cluster User, etc.).
To control whether actions execute automatically or require approval, see run modes.
Click Next.
Step 5: Review and deploy
- Review your configuration.
- Click Create.
- Wait a few minutes for deployment.
- Click Chat with agent when complete.
Verify it works
Ask your agent:
What Azure resources can you see?
You should see: A summary like "I found 251 resources across 3 resource groups, including 5 Container Apps, 2 AKS clusters..."
Your agent also shows:
- Resource groups table with monitored groups
- Resource analysis by type
- Suggested prompts tailored to YOUR resources
What you unlocked
✅ Your agent now:
- Has read access to resources in your selected resource groups
- Can query Azure Monitor logs and metrics for those resources
- Is ready to answer questions about your infrastructure
Alternative: Subscription-level access
If you skipped Step 3 or want broader access than individual resource groups, you can grant the agent Reader access on your entire subscription:
- Go to Settings → Basics in your agent.
- Click the Managed identity link to open it in Azure portal.
- Navigate to your subscription's Access control (IAM).
- Add a Reader role assignment for the agent's managed identity.
This gives the agent visibility into all resources in the subscription without selecting individual resource groups.
Next step
→ Step 2: Add Your Team's Knowledge
Learn more
- Permissions and roles — Detailed permission model
- User roles — Who can access your agent and what they can do
- Run modes — Control how much autonomy your agent has
- Supported regions — Full list of available regions
- Azure observability — What your agent can do with Azure access