Create and Edit Scheduled Tasks
A recurring automated task that runs on a schedule — from daily health checks to weekly reports. Learn more → Scheduled Tasks.
Prerequisites
- An agent with the connectors and permissions needed for your task
- A clear understanding of what you want to automate
Create a scheduled task
1. Open Scheduled Tasks
Select Scheduled tasks in the left sidebar.
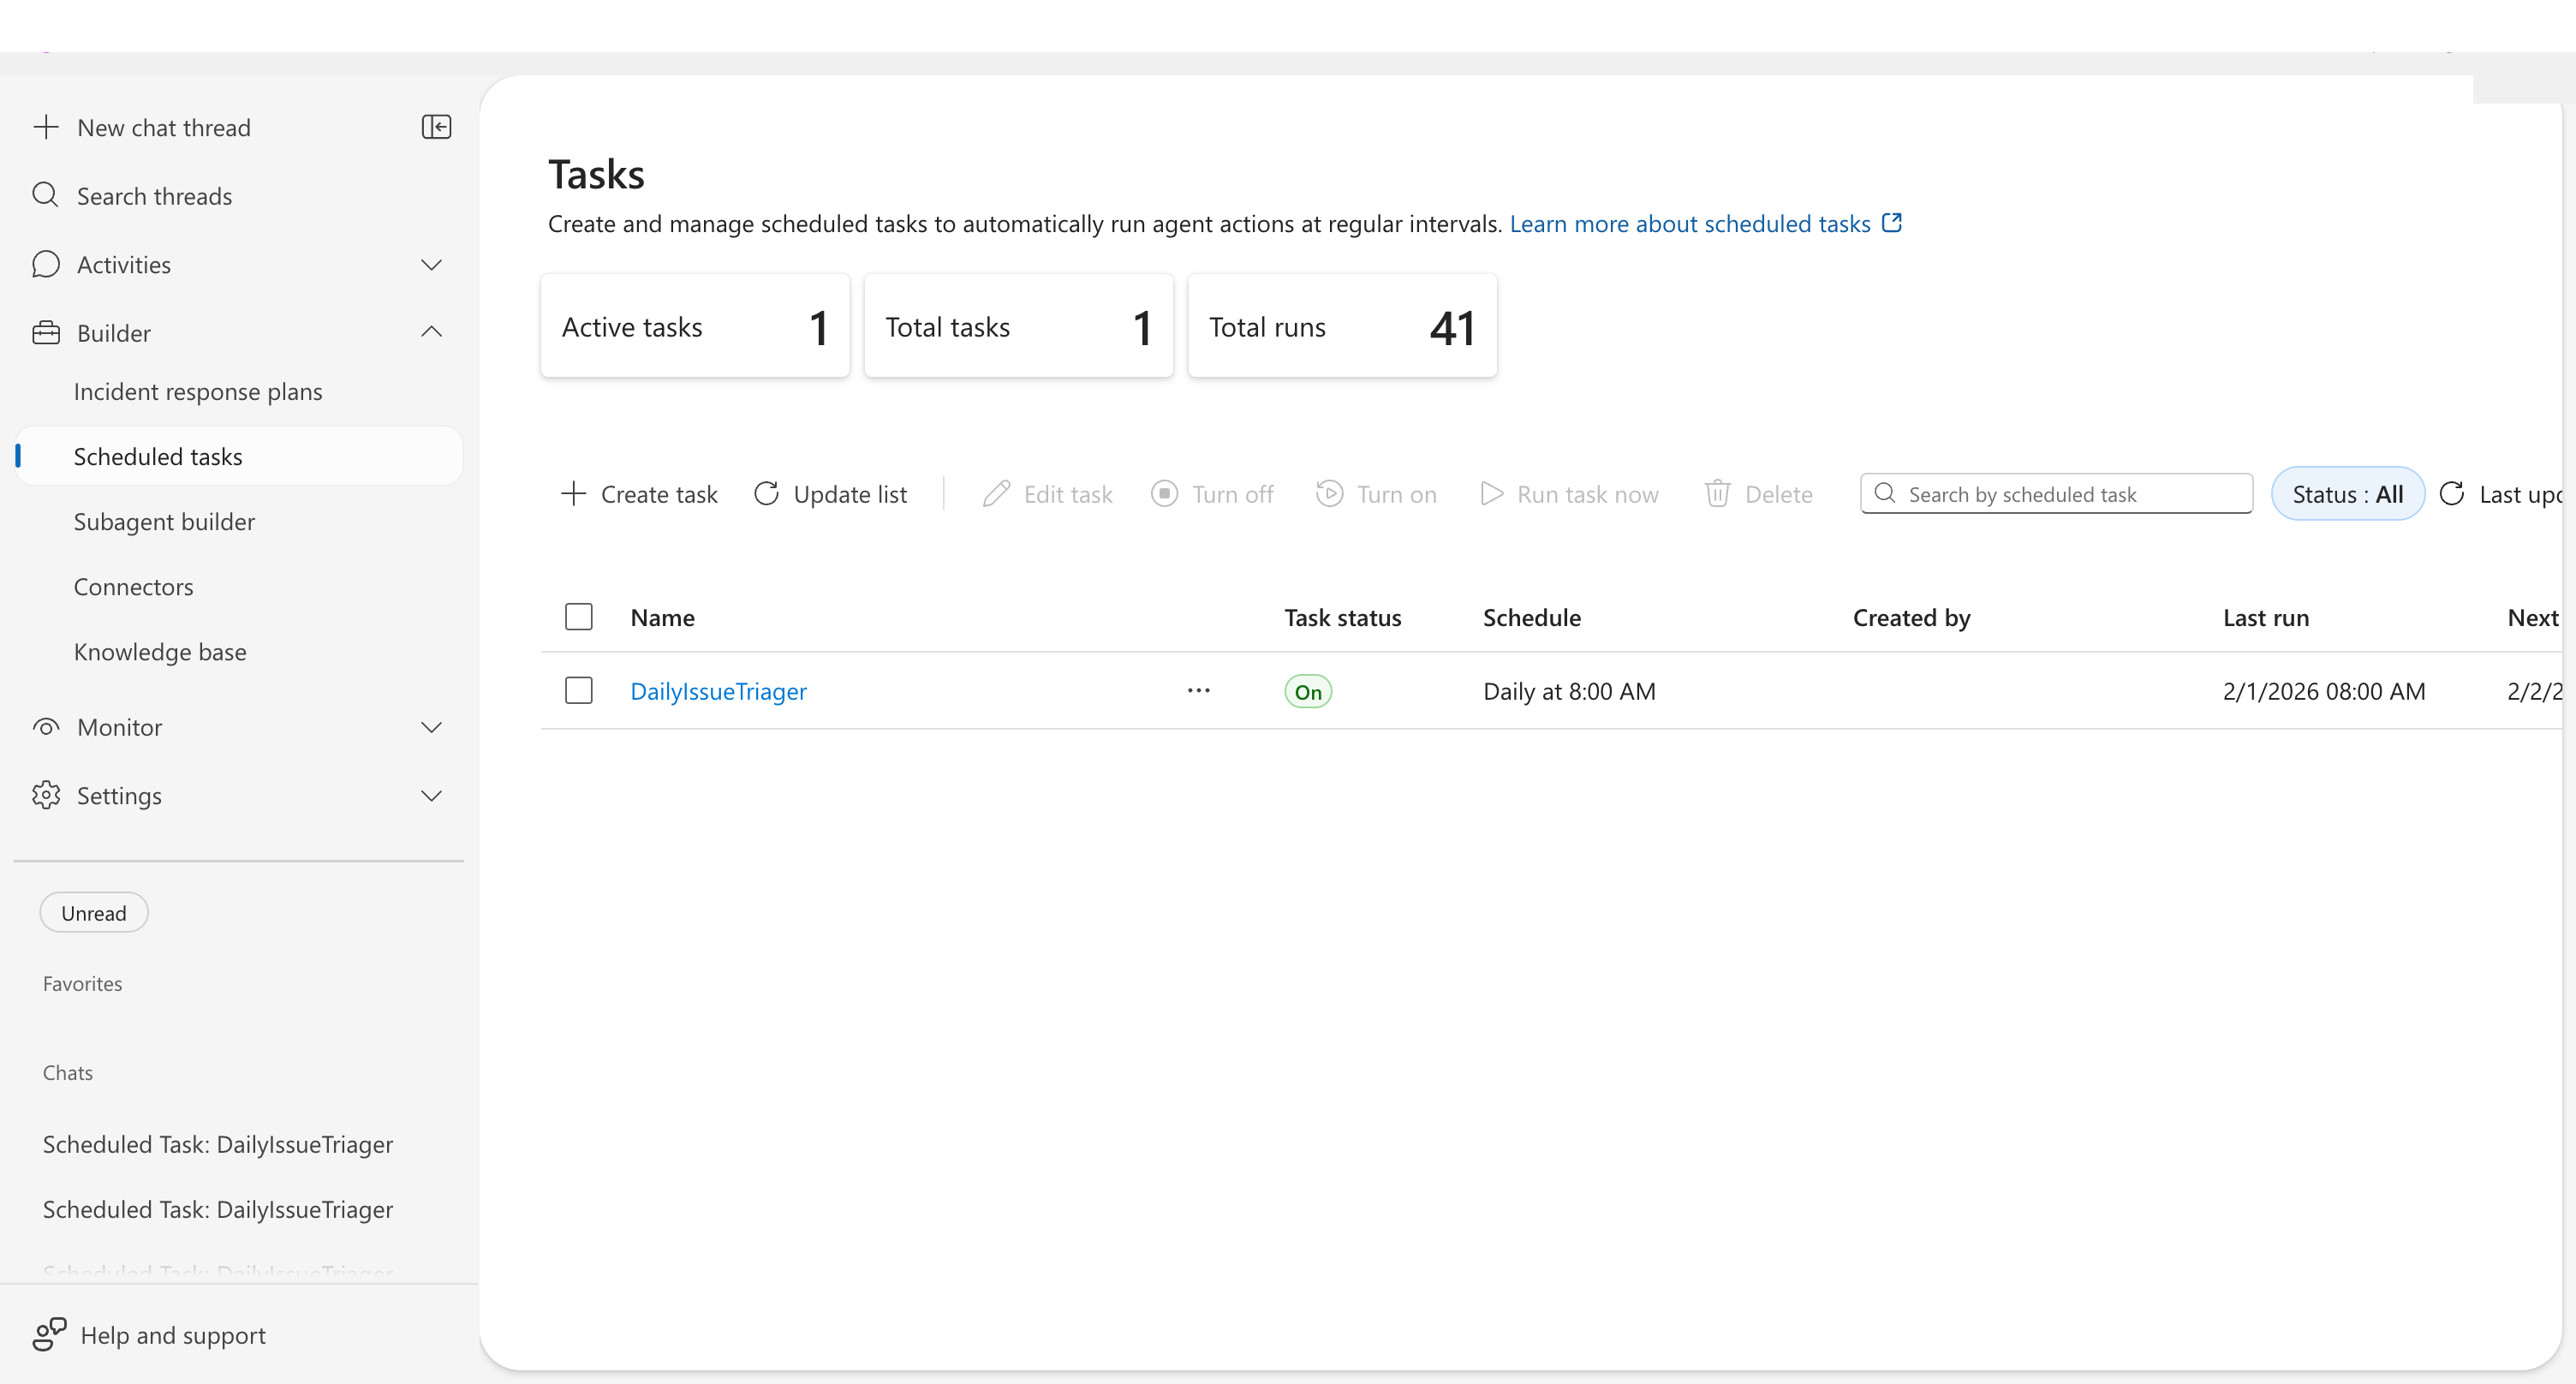
2. Click Create Task
Click Create task in the toolbar.
3. Define your task
Fill in the form:
| Field | Example value |
|---|---|
| Task name | Daily Health Check |
| Task details | Check Azure Resource Health for all resources in prod-rg. Summarize healthy, warning, and critical counts. |
| Frequency | Daily |
| Time of day (timezone) | 9:00 AM |
Leave optional fields at their defaults:
- Response subagent — leave empty to use the main agent
- Model tier — defaults to General Purpose, which balances accuracy, cost, and speed. Choose Fast for simple status checks or Reasoning for complex analysis. See Model tiers.
- Message grouping for updates — "Use same thread" groups results together
- Agent autonomy level — Autonomous (Default) lets the agent act without approval
When you select Weekly, a Day of week dropdown appears (default: Monday). For Monthly, a Day of month dropdown appears (default: 1). For Custom cron, the time picker is replaced by a Cron expression (UTC) text field.
If your custom cron expression runs more often than every 30 minutes and the Repeat until date is more than one day out, a warning appears advising you to review your schedule. High-frequency tasks generate more executions and higher costs. The warning is advisory — it does not block task creation.
4. Click Create task
Checkpoint: Your task appears in the list with status On. You should see the task name, frequency, and next run time you configured.
Verify it works
After the first scheduled run, click the task name to view execution history. Each execution creates a conversation thread showing:
- Planning steps — how the agent decided what to do
- Tool usage — which connectors and tools were called, with timing
- Memory context — relevant past findings the agent considered
- Outcome summary — results, recommendations, and any notifications sent
If a run failed, the thread shows the error. After 3 consecutive failures, the task status changes to Failed.
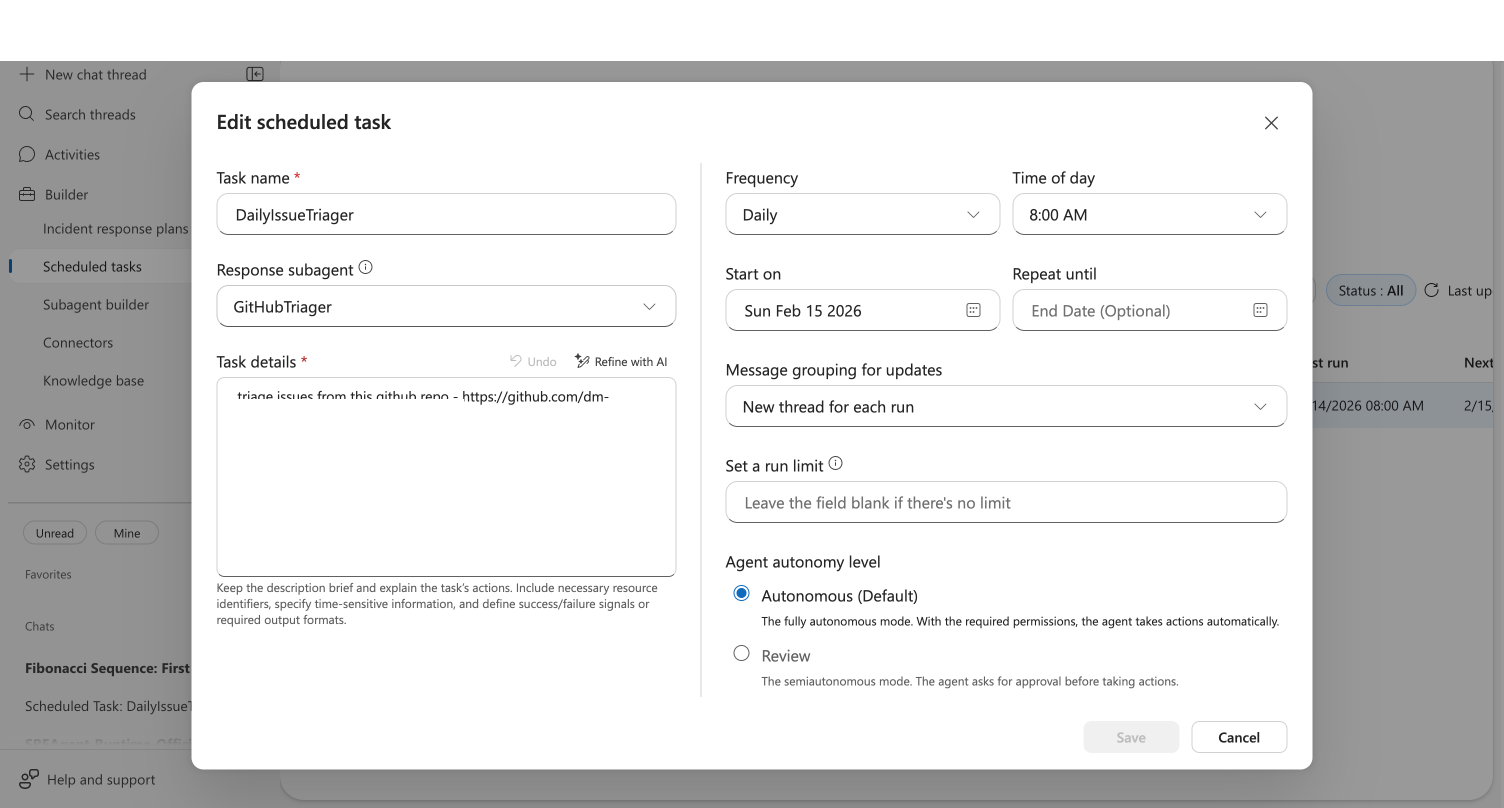
Edit a scheduled task
Need to change the schedule, update instructions, or switch the agent mode? Edit the task directly — no need to recreate it. Your task's execution history is preserved across edits.
1. Select the task
In the task list, either:
- Check the task's checkbox and click Edit task in the toolbar
- Click ⋯ on the task row and select Edit task
- Or click the task name to open execution history, then click Edit task
2. Modify fields
The edit dialog opens with all current values pre-populated. Change what you need:
| What to change | Field to update |
|---|---|
| When it runs | Frequency and Time of day (timezone) |
| What it does | Task details |
| Who handles it | Response subagent |
| How long it runs | Repeat until or Run limit |
| Model quality/cost | Model tier |
| Safety level | Agent autonomy level |
3. Click Save
Your changes take effect immediately. The next run uses the updated configuration.
Checkpoint: A notification confirms the update. Click the task name to verify your execution history is still intact — all previous runs remain visible alongside future runs with the updated settings.
Use Refine with AI on the Task details field to improve your instructions after seeing initial results.
Alternative: Create from the Agent Canvas
You can also create a scheduled task directly from a custom agent node in the canvas view. This approach pre-selects the custom agent as the task responder — useful when you want a specialized custom agent to handle the task.
- Go to Builder → Agent Canvas
- Find the custom agent you want to assign the task to
- Click the circular + button on the left side of the custom agent node
- Under the Trigger group, click Add scheduled task
- The create dialog opens with the Response subagent pre-selected — fill in the remaining fields as described above
The task appears both on the canvas (connected to the custom agent) and in the Scheduled tasks list.
Common schedules
| Use case | Frequency | Time |
|---|---|---|
| Morning health check | Daily | 9:00 AM |
| Hourly error scan | Custom cron: 0 * * * * | Every hour |
| Weekly cost report | Weekly (Monday) | 8:00 AM |
| Monthly capacity review | Monthly (1st) | 9:00 AM |
What you learned
- How to create a scheduled task from the Scheduled tasks page and from the Agent Canvas
- How to configure frequency, time, and response custom agent
- How to edit a task in place while preserving execution history
- How to verify scheduled tasks
Related
| Resource | What you'll learn |
|---|---|
| Scheduled Tasks → | Full capability reference |
| Workflow Automation → | Connect tasks with triggers and custom agents |
| Custom agents → | Assign specialized custom agents to handle scheduled tasks |