Setting Up PagerDuty
A live connection between your PagerDuty account and your SRE Agent, so the agent automatically picks up PagerDuty incidents and investigates them. Learn more → PagerDuty Incident Indexing.
Prerequisites
- An Azure SRE Agent in Running state
- A PagerDuty account with at least one service configured
- A PagerDuty REST API v2 access key (PagerDuty API Access Keys)
- Contributor role or higher on the SRE Agent resource
Step 1: Open Incident platform
- Navigate to sre.azure.com and select your agent
- In the sidebar, expand Builder
- Click Incident platform
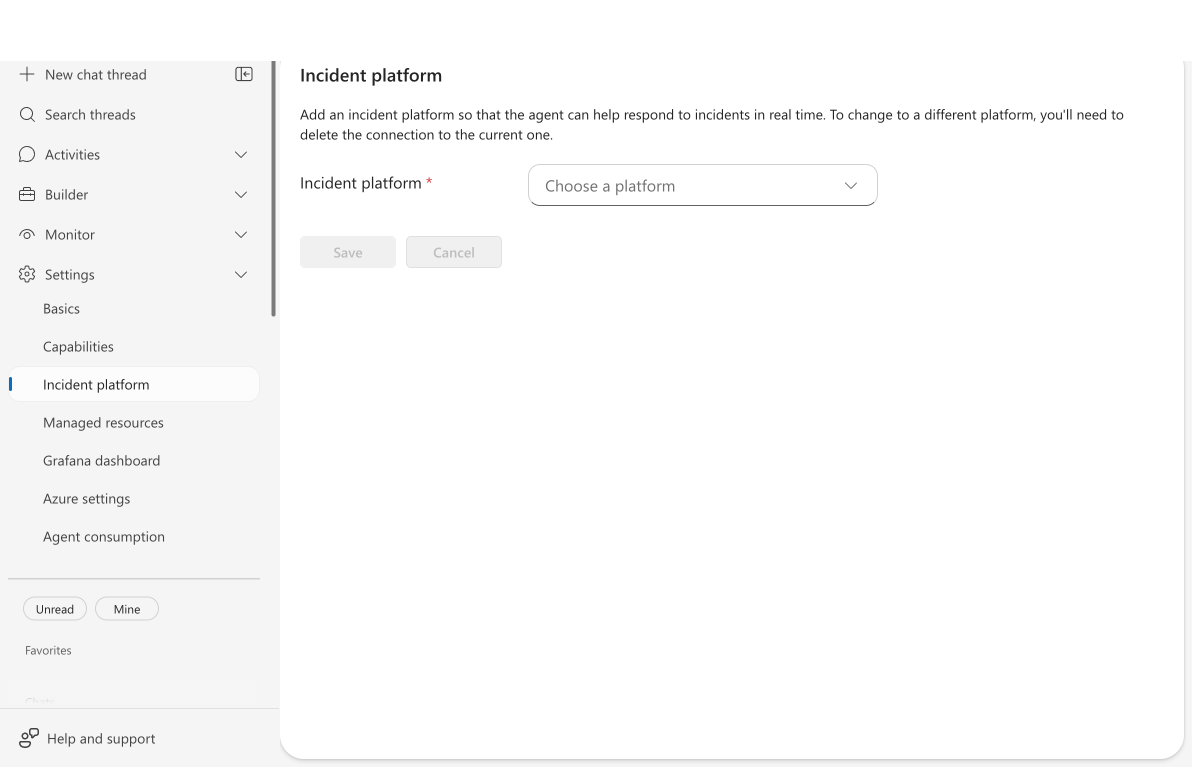
Checkpoint: You see the "Incident platform" heading with a platform dropdown showing "Choose a platform."
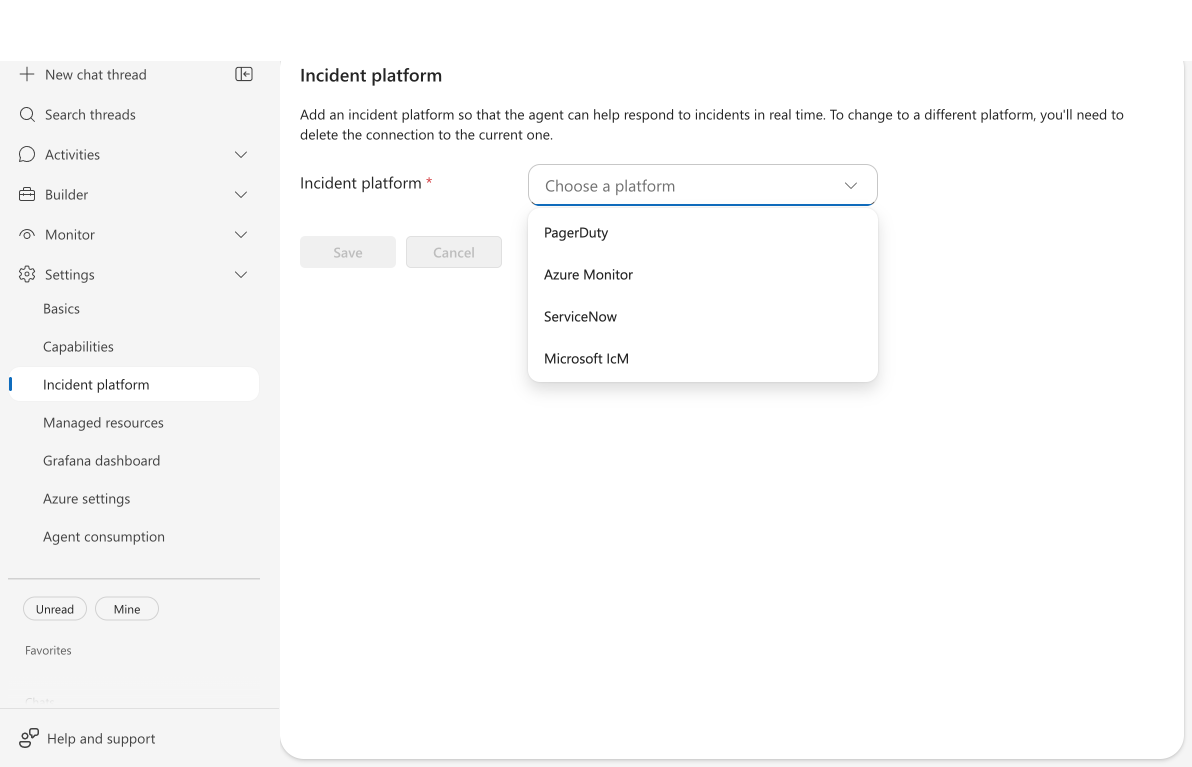
Step 2: Select PagerDuty
- Click the Incident platform dropdown
- Select PagerDuty
If another platform is already connected, you'll be prompted to disconnect it first. Your agent connects to one incident platform at a time.
Checkpoint: The PagerDuty form appears with a green "PagerDuty" heading, a description, and an API key field.
Step 3: Enter your PagerDuty API key
- Enter your REST API access key in the field
The agent validates your key instantly by calling the PagerDuty API. A validation spinner appears briefly, then either succeeds silently or shows an error.
In PagerDuty, go to Integrations → API Access Keys → Create New API Key. The key needs incident read access at minimum. For full functionality (acknowledge, resolve, add notes), use a key with write access.
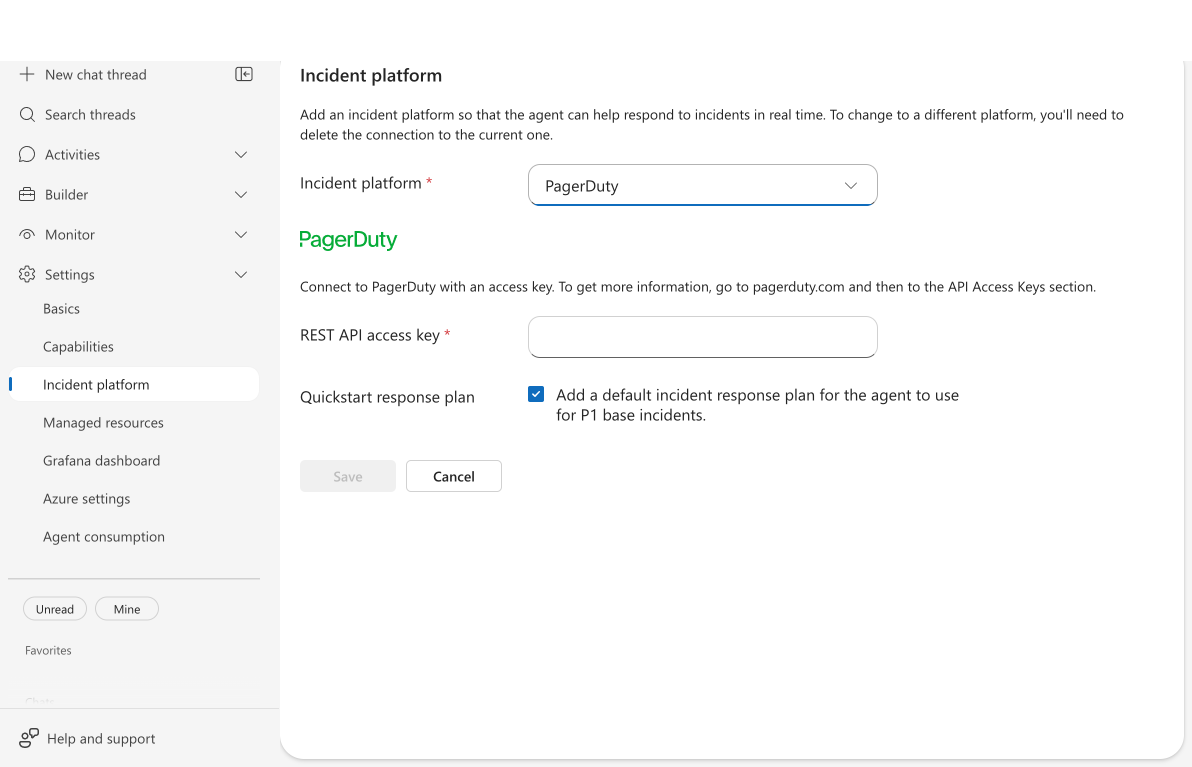
Checkpoint: No validation error appears below the key field. The Save button becomes active.
If you see "The access key is not valid. Please try again." — verify your key in PagerDuty under Integrations → API Access Keys. Regenerate the key if it has expired.
Step 4: Enable quickstart response plan
The Quickstart response plan checkbox is enabled by default: "Add a default incident response plan for the agent to use for P1 base incidents."
This creates a response plan that:
- Matches P1 priority PagerDuty incidents
- Runs in fully autonomous mode
- Covers all owning services
Leave this checked to start with automated P1 incident handling. If you uncheck it, no incidents will appear until you create a response plan manually — the scanner runs every minute but skips when no response plans are configured. You can customize or add more response plans later from Activities → Incidents.
Step 5: Save and connect
- Click Save
- The connectivity indicator shows "Connecting to PagerDuty ..."
- Wait for the indicator to show "PagerDuty is connected." — typically 30 seconds to 2 minutes
If you see "Connection to PagerDuty failed. Please check your access key and try again.":
- Verify your API key is correct and hasn't expired
- Confirm the key has incident read permissions
- Check that your PagerDuty account is active
Checkpoint: The connectivity indicator shows a green "PagerDuty is connected." status.
Step 6: Verify incidents appear
- In the sidebar, click Activities
- Click Incidents
- Wait 1–2 minutes for the scanner to complete its first cycle
PagerDuty incidents matching your response plan filters appear in the incident overview grid.
Checkpoint: PagerDuty incidents appear with columns for ID, Title, Priority, Status, Agent Status, Created, Owning Service, and Handler.
Edit or disconnect PagerDuty
Edit connection settings
- Go to Builder → Incident platform
- Click Edit at the bottom of the page
- Modify the API key or other settings
- Click Save
Disconnect PagerDuty
- Go to Builder → Incident platform
- Click Disconnect at the bottom of the page
- A confirmation dialog appears — click Yes to confirm
After disconnecting, the agent stops scanning for PagerDuty incidents. Your response plans are preserved and reactivate when you reconnect.
To switch from PagerDuty to another platform (such as ServiceNow), disconnect PagerDuty first. Selecting a different platform from the dropdown triggers a disconnect confirmation automatically.
What you learned
- How to connect PagerDuty with a REST API access key
- How instant API key validation catches invalid credentials during setup
- How the quickstart response plan automates P1 incident handling
- Where to monitor indexed incidents in Activities → Incidents
Troubleshooting
| Issue | Solution |
|---|---|
| "The access key is not valid" | Verify the key in PagerDuty → Integrations → API Access Keys. Regenerate if expired. |
| "Connection to PagerDuty failed" | Check key permissions — needs incident read access at minimum. |
| No incidents appear after setup | Wait 1–2 minutes for the first scan cycle. Verify incidents exist in PagerDuty matching response plan filters. |
| Need to switch from another platform | Disconnect the current platform first — one platform at a time. |
| Connectivity indicator stays "Connecting" | Allow up to 2 minutes. If it times out, re-enter the API key. |
Related
| Resource | What you'll learn |
|---|---|
| PagerDuty Incident Indexing → | How PagerDuty indexing works and why it matters |
| Incident Response Plans → | Create response plans to route different priorities to different run modes |
| Incident Response → | How your agent investigates and responds to incidents |