Step 5: Automate Workflows
Your team probably has recurring tasks — checking service health every morning, reviewing overnight alerts, verifying certificate expirations, or posting weekly capacity reports. Connect your tools, build a workflow, and let the agent run it on a schedule.
What you'll accomplish
- Connect a notification tool so the agent can send messages
- Create a custom agent that uses that tool
- Schedule a recurring health check that runs automatically
- See the complete workflow on the visual canvas
Prerequisites
| Requirement | Details |
|---|---|
| Completed Steps 1–2 | Create and set up and Team onboarding |
Steps 3 and 4 (First investigation and Automate incidents) are not required for this step, but completing them first gives you a better understanding of what workflows can automate.
How it works
Automation connects three building blocks — each one set up through the portal:
| Building block | What it does | Example |
|---|---|---|
| Connector | Gives the agent access to an external service | Teams, Outlook, Jira, Grafana |
| Custom agent | A specialized worker with access to specific tools | health-check-reporter with permission to send messages |
| Scheduled task | Triggers a custom agent on a recurring schedule | "Every morning at 8 AM, check resource health and send a summary" |
Add a connector
Connectors let the agent interact with external services. Start with a notification tool so your agent can report findings. This guide walks through setting up the Outlook connector — for Teams, see Set Up Teams Connector.
- Go to Builder → Connectors in the left sidebar.
- Click Add connector.
- Select the Notification tab, then select Outlook Tools (Office 365 Outlook).
- Sign in and authorize access.
- Click Next.
- Select a Managed identity — the agent uses this identity at runtime to securely access the connector. We recommend using a User assigned managed identity so you can reuse it across connectors and manage its lifecycle independently.
- Click Next, review your configuration, then click Add connector.
Some connectors require both OAuth sign-in and a managed identity. OAuth authorizes access to the external service, while the managed identity authenticates the agent to Azure Resource Manager at runtime.
Checkpoint: The connector appears in your connectors list with a "Connected" status.

You can also add MCP-based connectors for Datadog, Splunk, Elasticsearch, Dynatrace, New Relic, and custom MCP servers. See MCP Connectors for the full list.
Create a custom agent
Custom agents are specialized workers with access to specific tools. Create one for health reporting.
- Go to Builder → Agent Canvas in the left sidebar.
- Click the Create dropdown in the toolbar and select Custom Agent. The creation dialog opens with two tabs: Form and YAML.
- Fill in the required fields:
- Custom agent name — e.g.
health-check-reporter - Instructions — describe what this custom agent does, e.g. "You are a health check reporter. Check Azure resource health for my container apps and send a summary via email."
- Custom agent name — e.g.
- Click Choose tools and select the notification tool from your connector.
- Click Create.
The custom agent appears as a node on the visual canvas.
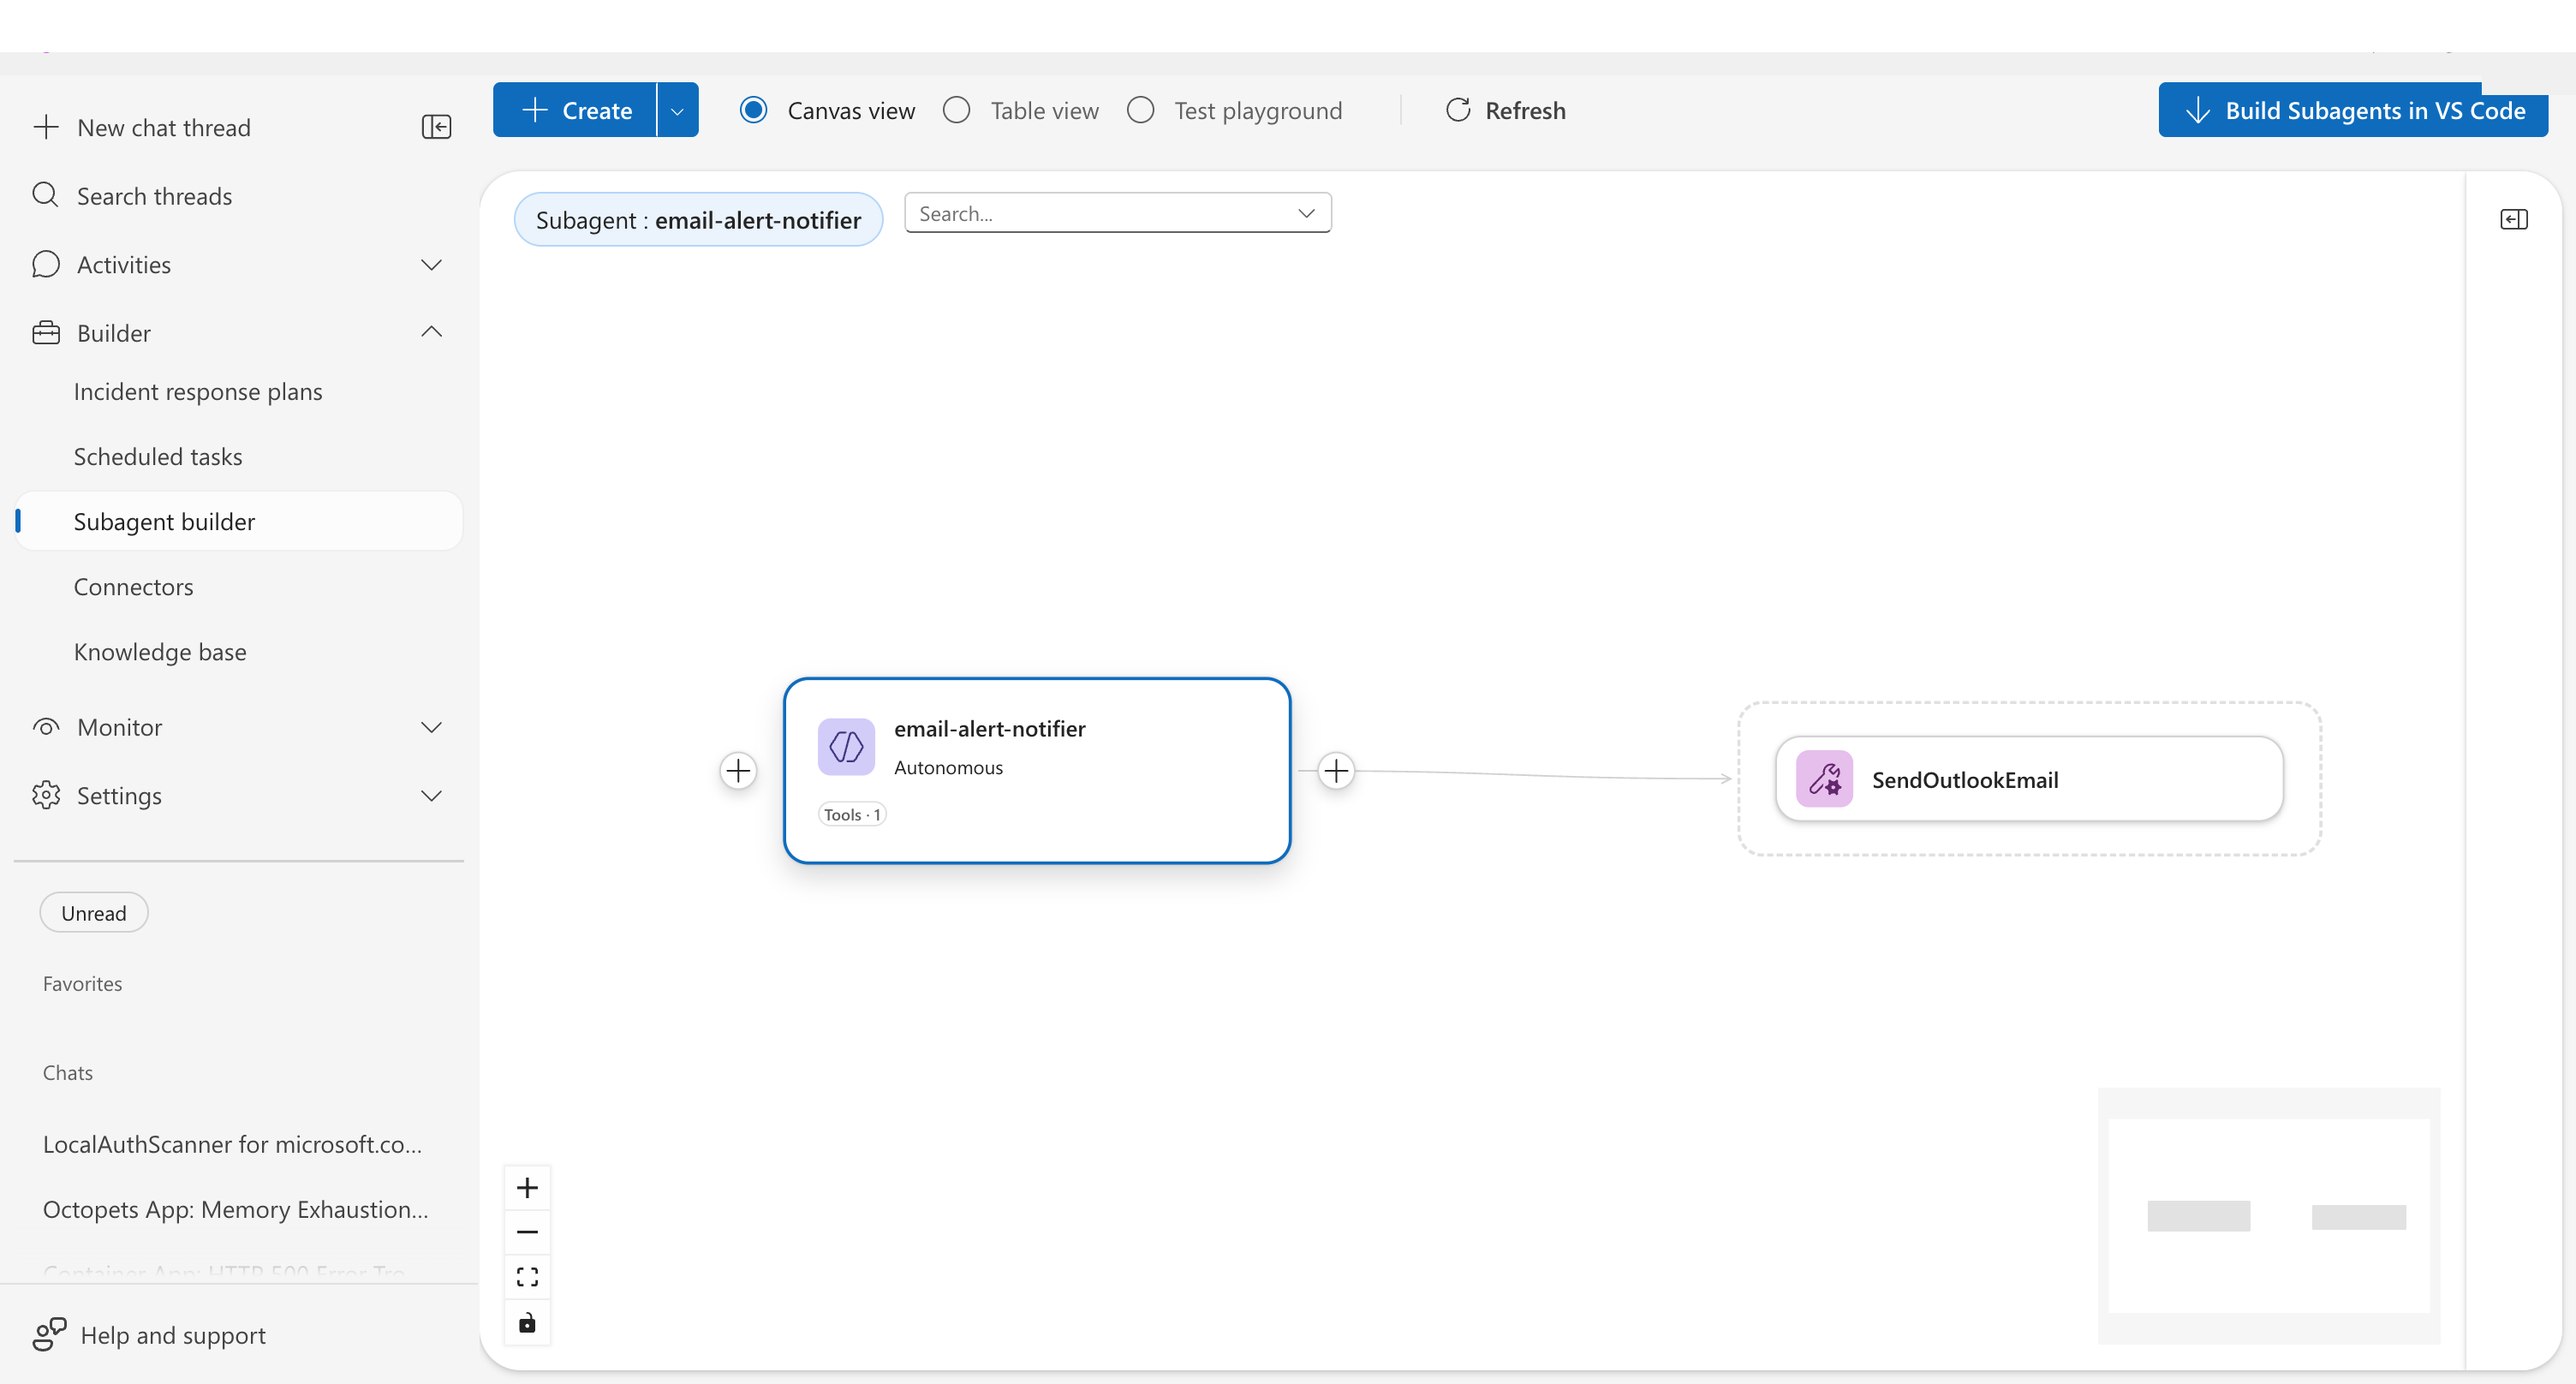
Checkpoint: Your custom agent shows on the canvas with the notification tool connected to it.
The custom agent form also lets you configure skills, hooks, and other advanced settings. See Create a Custom Agent for the full walkthrough.
Schedule a recurring task
Link a scheduled task to the custom agent so it runs automatically.
-
Click the + button on the left side of your custom agent node on the canvas — the Response subagent field is automatically populated with that agent.
-
Select Add scheduled task.
-
Fill in the required fields:
-
Task name — e.g.
daily-health-report -
Task details — describe what the agent should do:
Check the health of the container apps in my resource group. Verify all apps are running, check CPU and memory metrics over the last hour, review any recent warning logs. Summarize findings and send the report.
-
-
Set the Frequency (Daily by default) and Time of day — the label shows your local timezone (e.g. 9:00 AM PST).
-
Click Create task.
The canvas now shows the complete workflow chain visually.
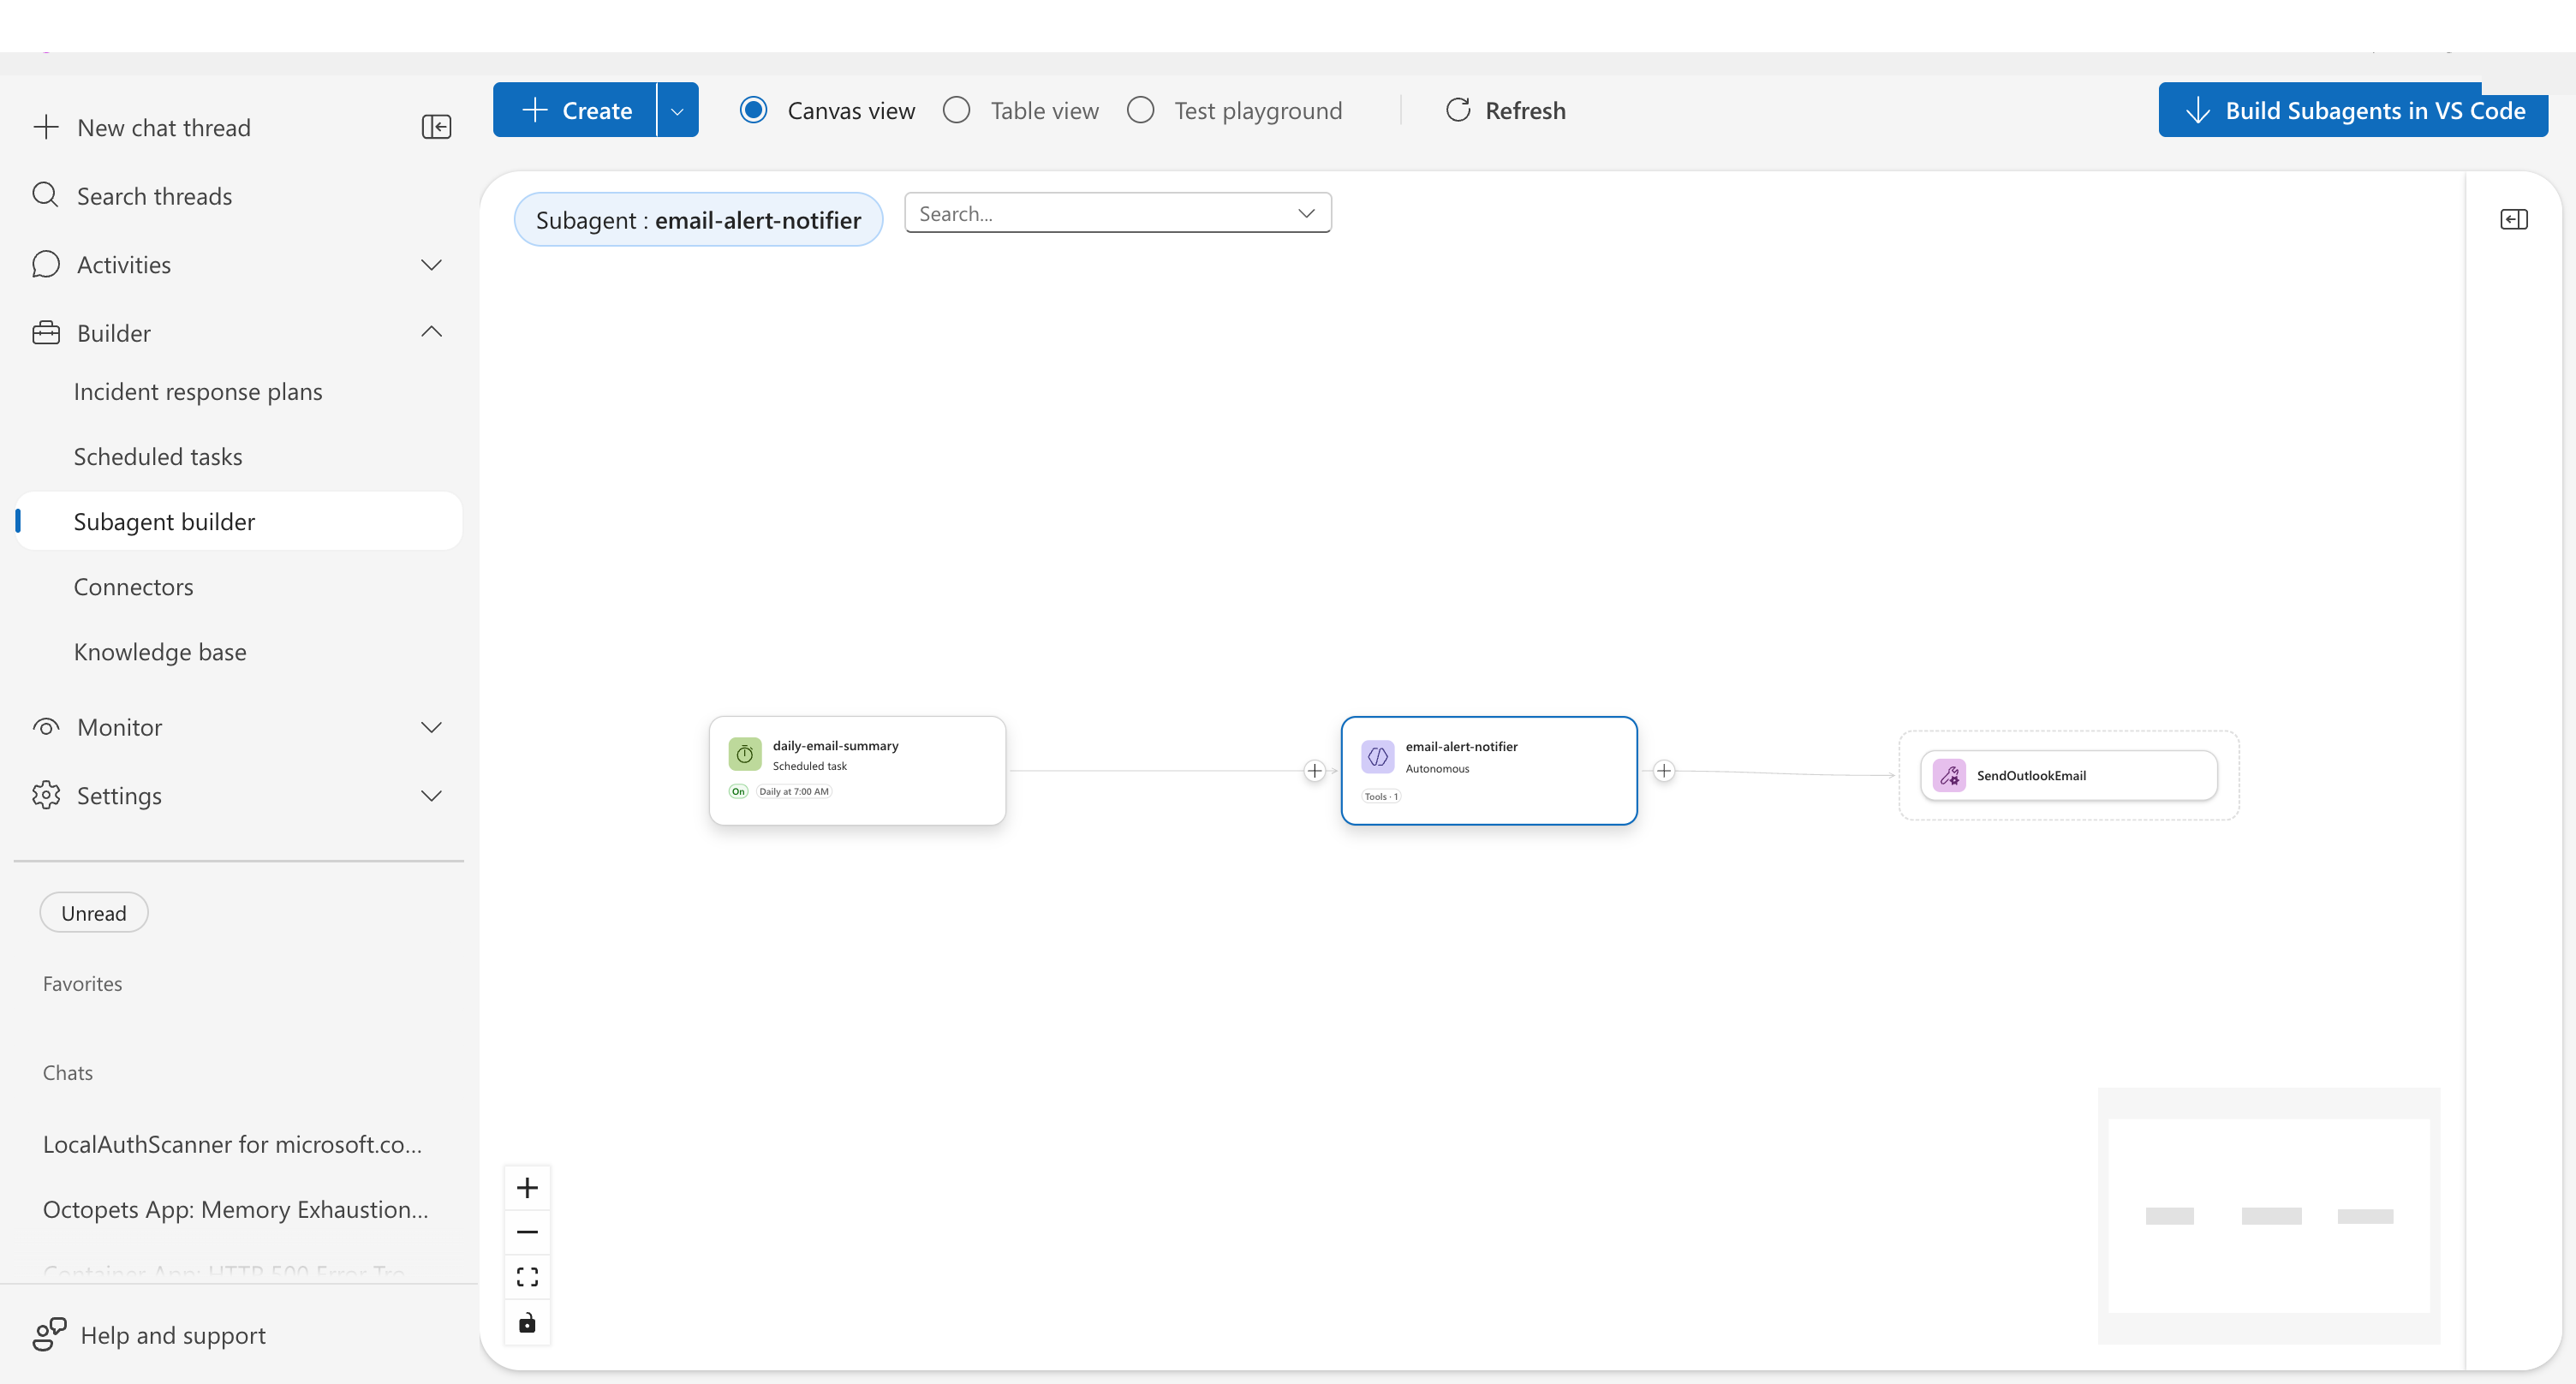
Checkpoint: The task appears on the canvas connected to your custom agent. You can see the full automation chain: Scheduled task → Custom agent → Tool.
Test it
Run the task immediately to verify everything works:
- Go to Scheduled tasks in the left sidebar.
- Select your task (check the checkbox).
- Click Run task now in the toolbar.
- To watch execution, click the task name to open the executions view, then click the thread name link — or find the thread under Chats in the sidebar.
The agent shows each step in real time: checking resources, collecting metrics, composing the report, and sending via your notification tool.
Checkpoint: You receive a health report. The chat thread shows the complete execution trace.
You've completed the getting-started journey
Your agent now delivers four outcomes:
- Autonomous incident response — alerts are acknowledged, investigated, and resolved without you typing a message
- Lightning-fast root cause analysis — the agent reads your code, queries your infrastructure, and traces issues to specific lines and configurations
- Extensible automation — scheduled tasks, connectors, and custom agents handle recurring work on your behalf
- Knowledge that never leaves — every investigation, every runbook, every conversation builds persistent expertise that stays with your team forever
The longer you use it, the better it gets. The runbooks you uploaded in Step 2, the investigation you ran in Step 3, the incidents it handled in Step 4 — all of that becomes persistent expertise the agent recalls automatically in future investigations.
Related capabilities
| Capability | What it adds |
|---|---|
| Scheduled Tasks | Advanced scheduling options and task management |
| Connectors | How connectors provide tools to your agent |
| Custom Agents | How custom agents delegate and specialize work |
Keep going
Now that you're set up, explore Concepts to understand how the agent thinks, or dive into Tutorials for hands-on guides on advanced features.
| Where to go | What you'll find |
|---|---|
| Concepts | How roles, permissions, memory, connectors, and agent reasoning work |
| Capabilities | Detailed pages on every feature the agent offers |
| Tutorials | Step-by-step guides for deep investigation, connectors, hooks, and more |