Step 3: Connect Source Code
10 min · Connect your GitHub repository. Your agent can now perform root cause analysis—correlating production issues to specific code.
What you'll accomplish
By the end of this step, your agent will:
- Analyze source code during investigations
- Provide file:line references for issues
- Create To-Do Plans showing investigation steps
- Correlate production symptoms to code changes
Prerequisites
| Requirement | Details |
|---|---|
| Agent created | Complete Step 1 first |
| GitHub PAT | Personal Access Token with repo scope |
Choose your approach
There are three ways to connect source code:
| Approach | Best for |
|---|---|
| Option A: Resource mapping | Single repo linked to a specific Azure resource |
| Option B: MCP + subagent | Access to all your GitHub repos |
| Option C: ADO Documentation connector | Azure DevOps repos and wikis as knowledge sources |
Pick whichever approach matches your setup. You can use multiple options together.
For Option C, see the ADO Wiki Knowledge capability page and Connect ADO Wiki tutorial.
Option A: Resource mapping
Associate a repository with an Azure resource. When investigating that resource, your agent automatically references the linked code.
Step 1: Open resource mapping
- Click Monitor in the left sidebar.
- Select Resource mapping.
- Find your resource in the list.
- Click the resource to open its detail view.
Step 2: Add repository
- Click Add repository.
- Paste your GitHub repository URL (e.g.,
https://github.com/your-org/your-repo). - Sign in to GitHub if prompted.
- Click Add.
The repository is now linked to that Azure resource.
Verify it works
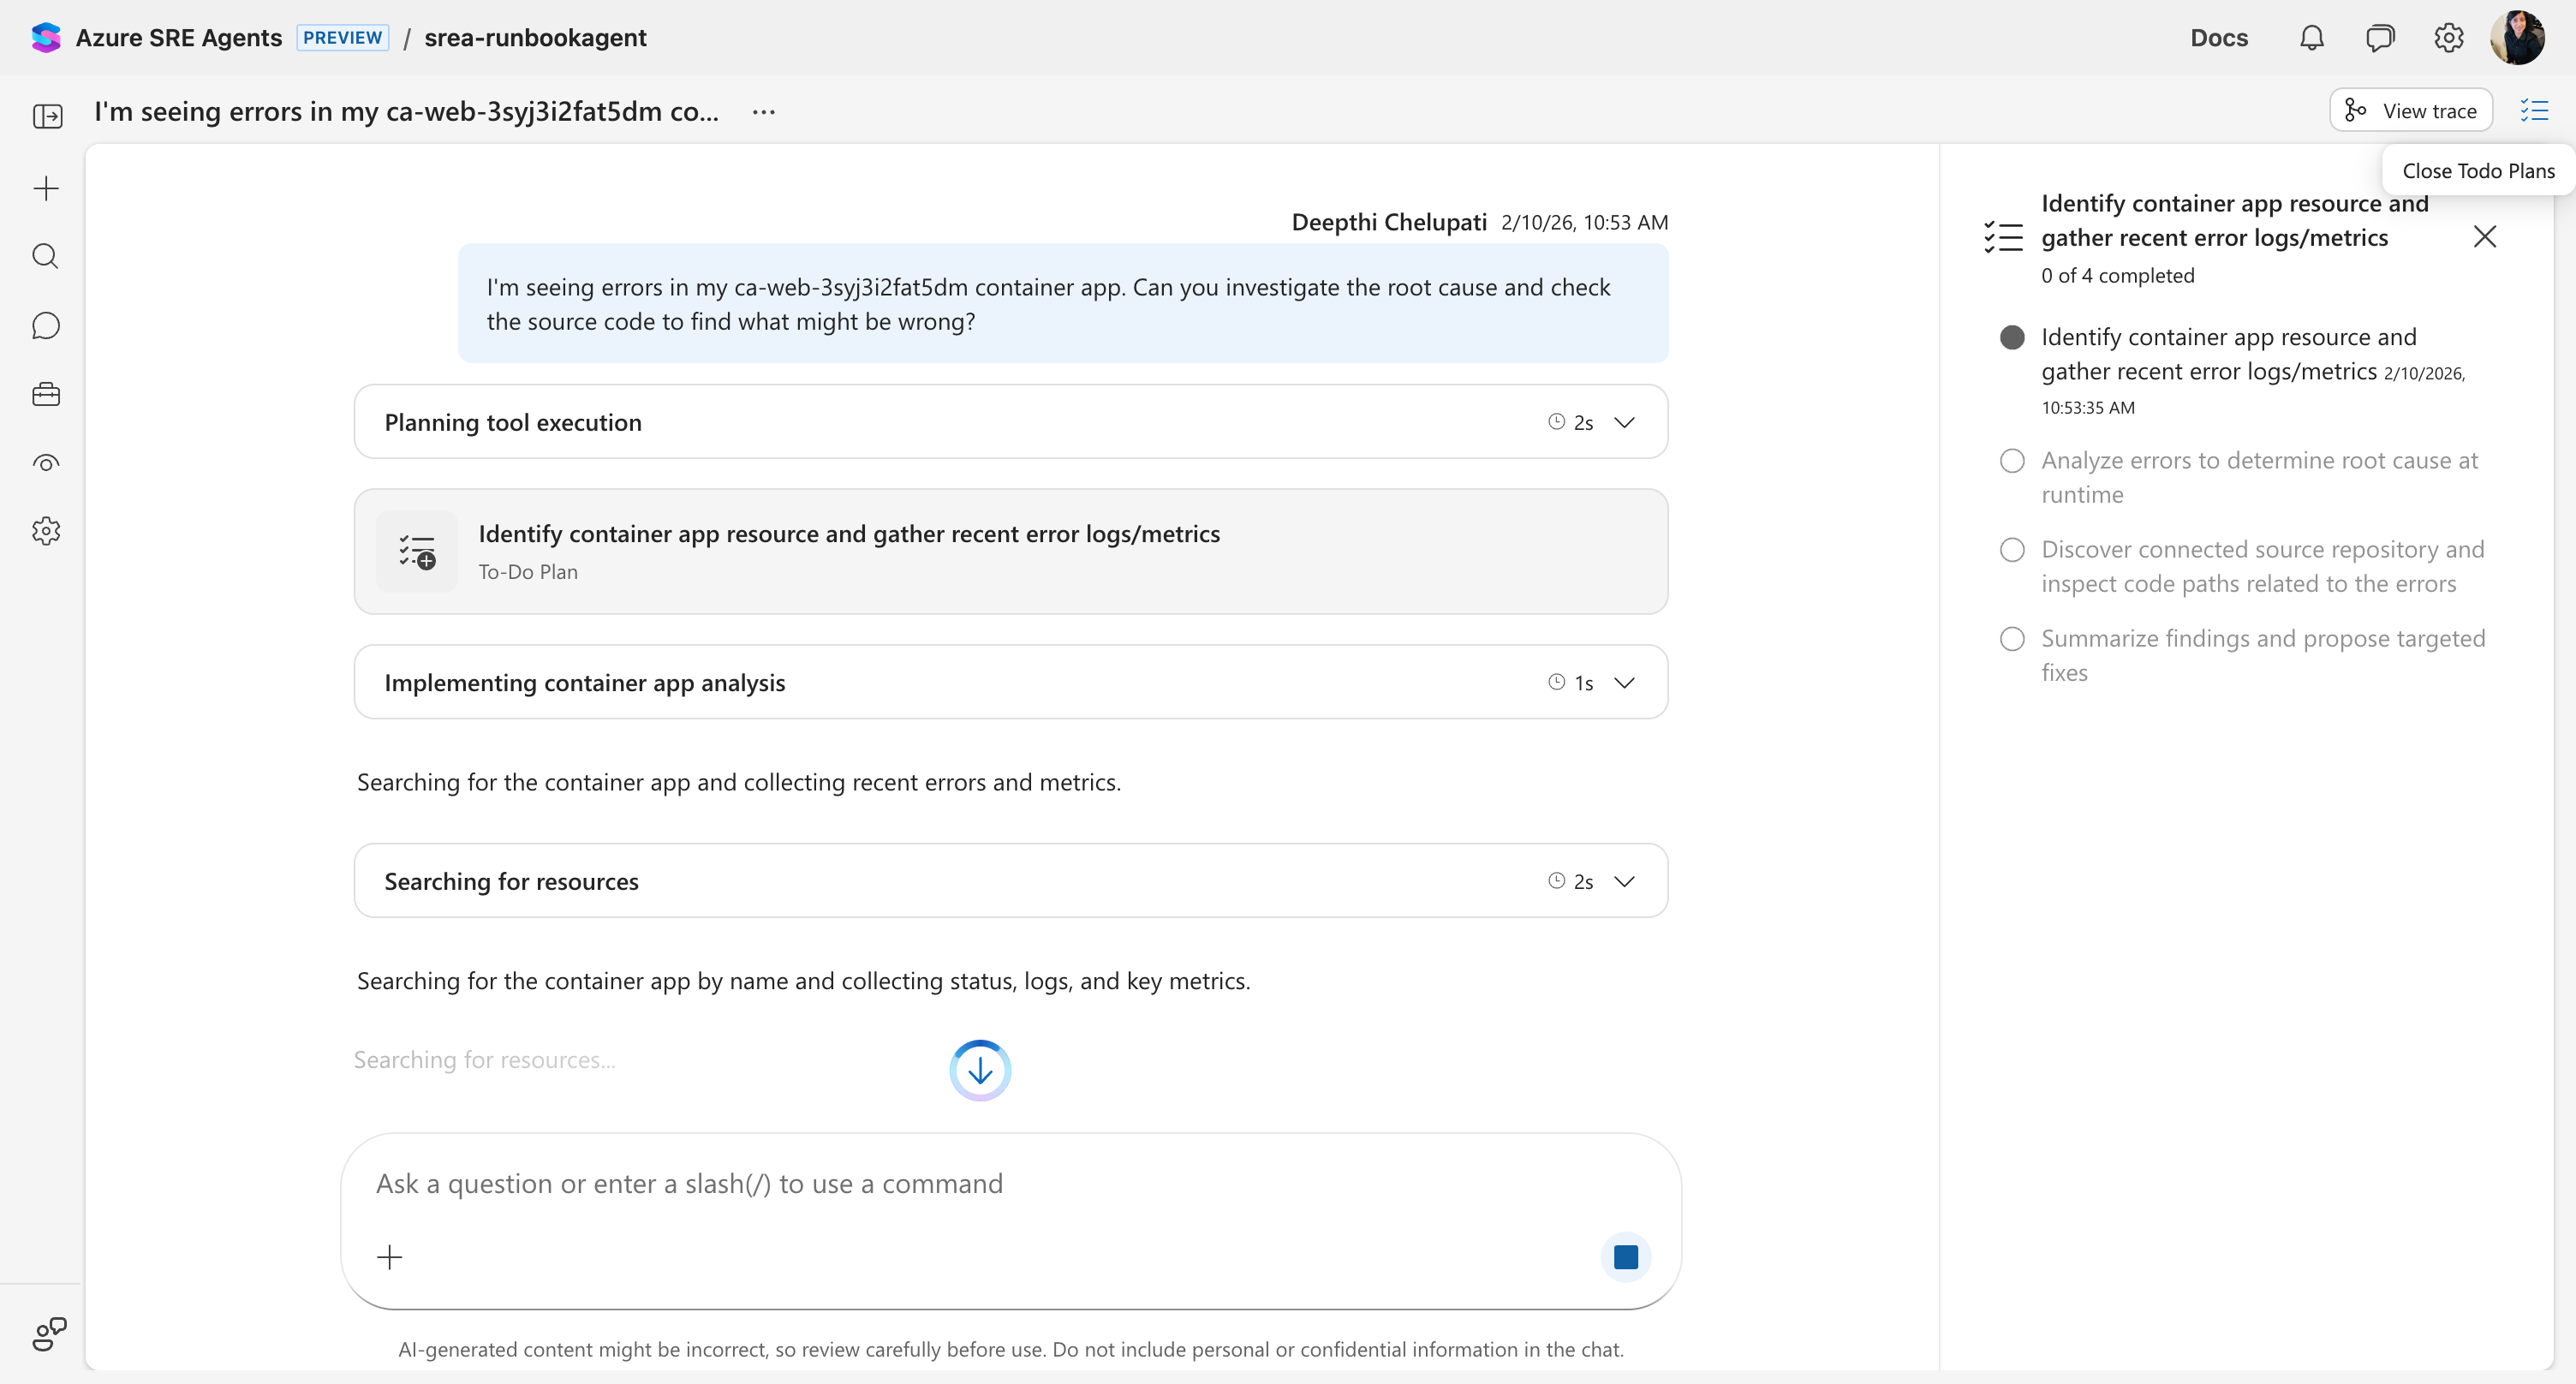
Ask your agent about the linked resource:
What could cause memory issues in the grocery-store-api container app?
You should see:
- Agent creates a To-Do Plan for the investigation
- Loads the
source_code_analysisskill - Searches through your linked repository
- Returns findings with specific file:line references
Option B: MCP + subagent (Advanced)
Connect GitHub as an MCP server for full access to GitHub features. This requires creating a subagent to use the MCP tools.
Step 1: Add GitHub connector
- Click Builder in the left sidebar.
- Select Connectors.
- Click Add connector.

- Select GitHub MCP server.
- Configure the connection:
| Field | Value |
|---|---|
| Name | my-github (or descriptive name) |
| Connection type | Streamable-HTTP (default) |
| URL | https://api.githubcopilot.com/mcp/ |
| Authentication method | Bearer token |
| Personal access token | Your GitHub PAT with repo scope |
- Click Next → Add connector.
- Wait for status to show Connected.

Step 2: Create a subagent
MCP tools are not available on the main agent—you need to create a subagent.
- Click Builder → Subagent builder.
- Click Create subagent.
- Configure the subagent:
| Field | Value |
|---|---|
| Name | github-analyst |
| Description | Analyzes GitHub repositories for root cause analysis |
| Instructions | You analyze source code to find root causes of production issues. When given a repository and symptoms, search for relevant code and provide file:line references. |
- In the Tools section, select the GitHub MCP tools you need (e.g.,
search_code,get_file_contents,list_commits). - Click Save.
Verify it works
Ask your agent to hand off to your new subagent:
Use the github-analyst subagent to analyze the code in my-org/my-repo for memory leaks.
The main agent will hand off to your subagent, which uses the GitHub MCP tools to analyze the code.
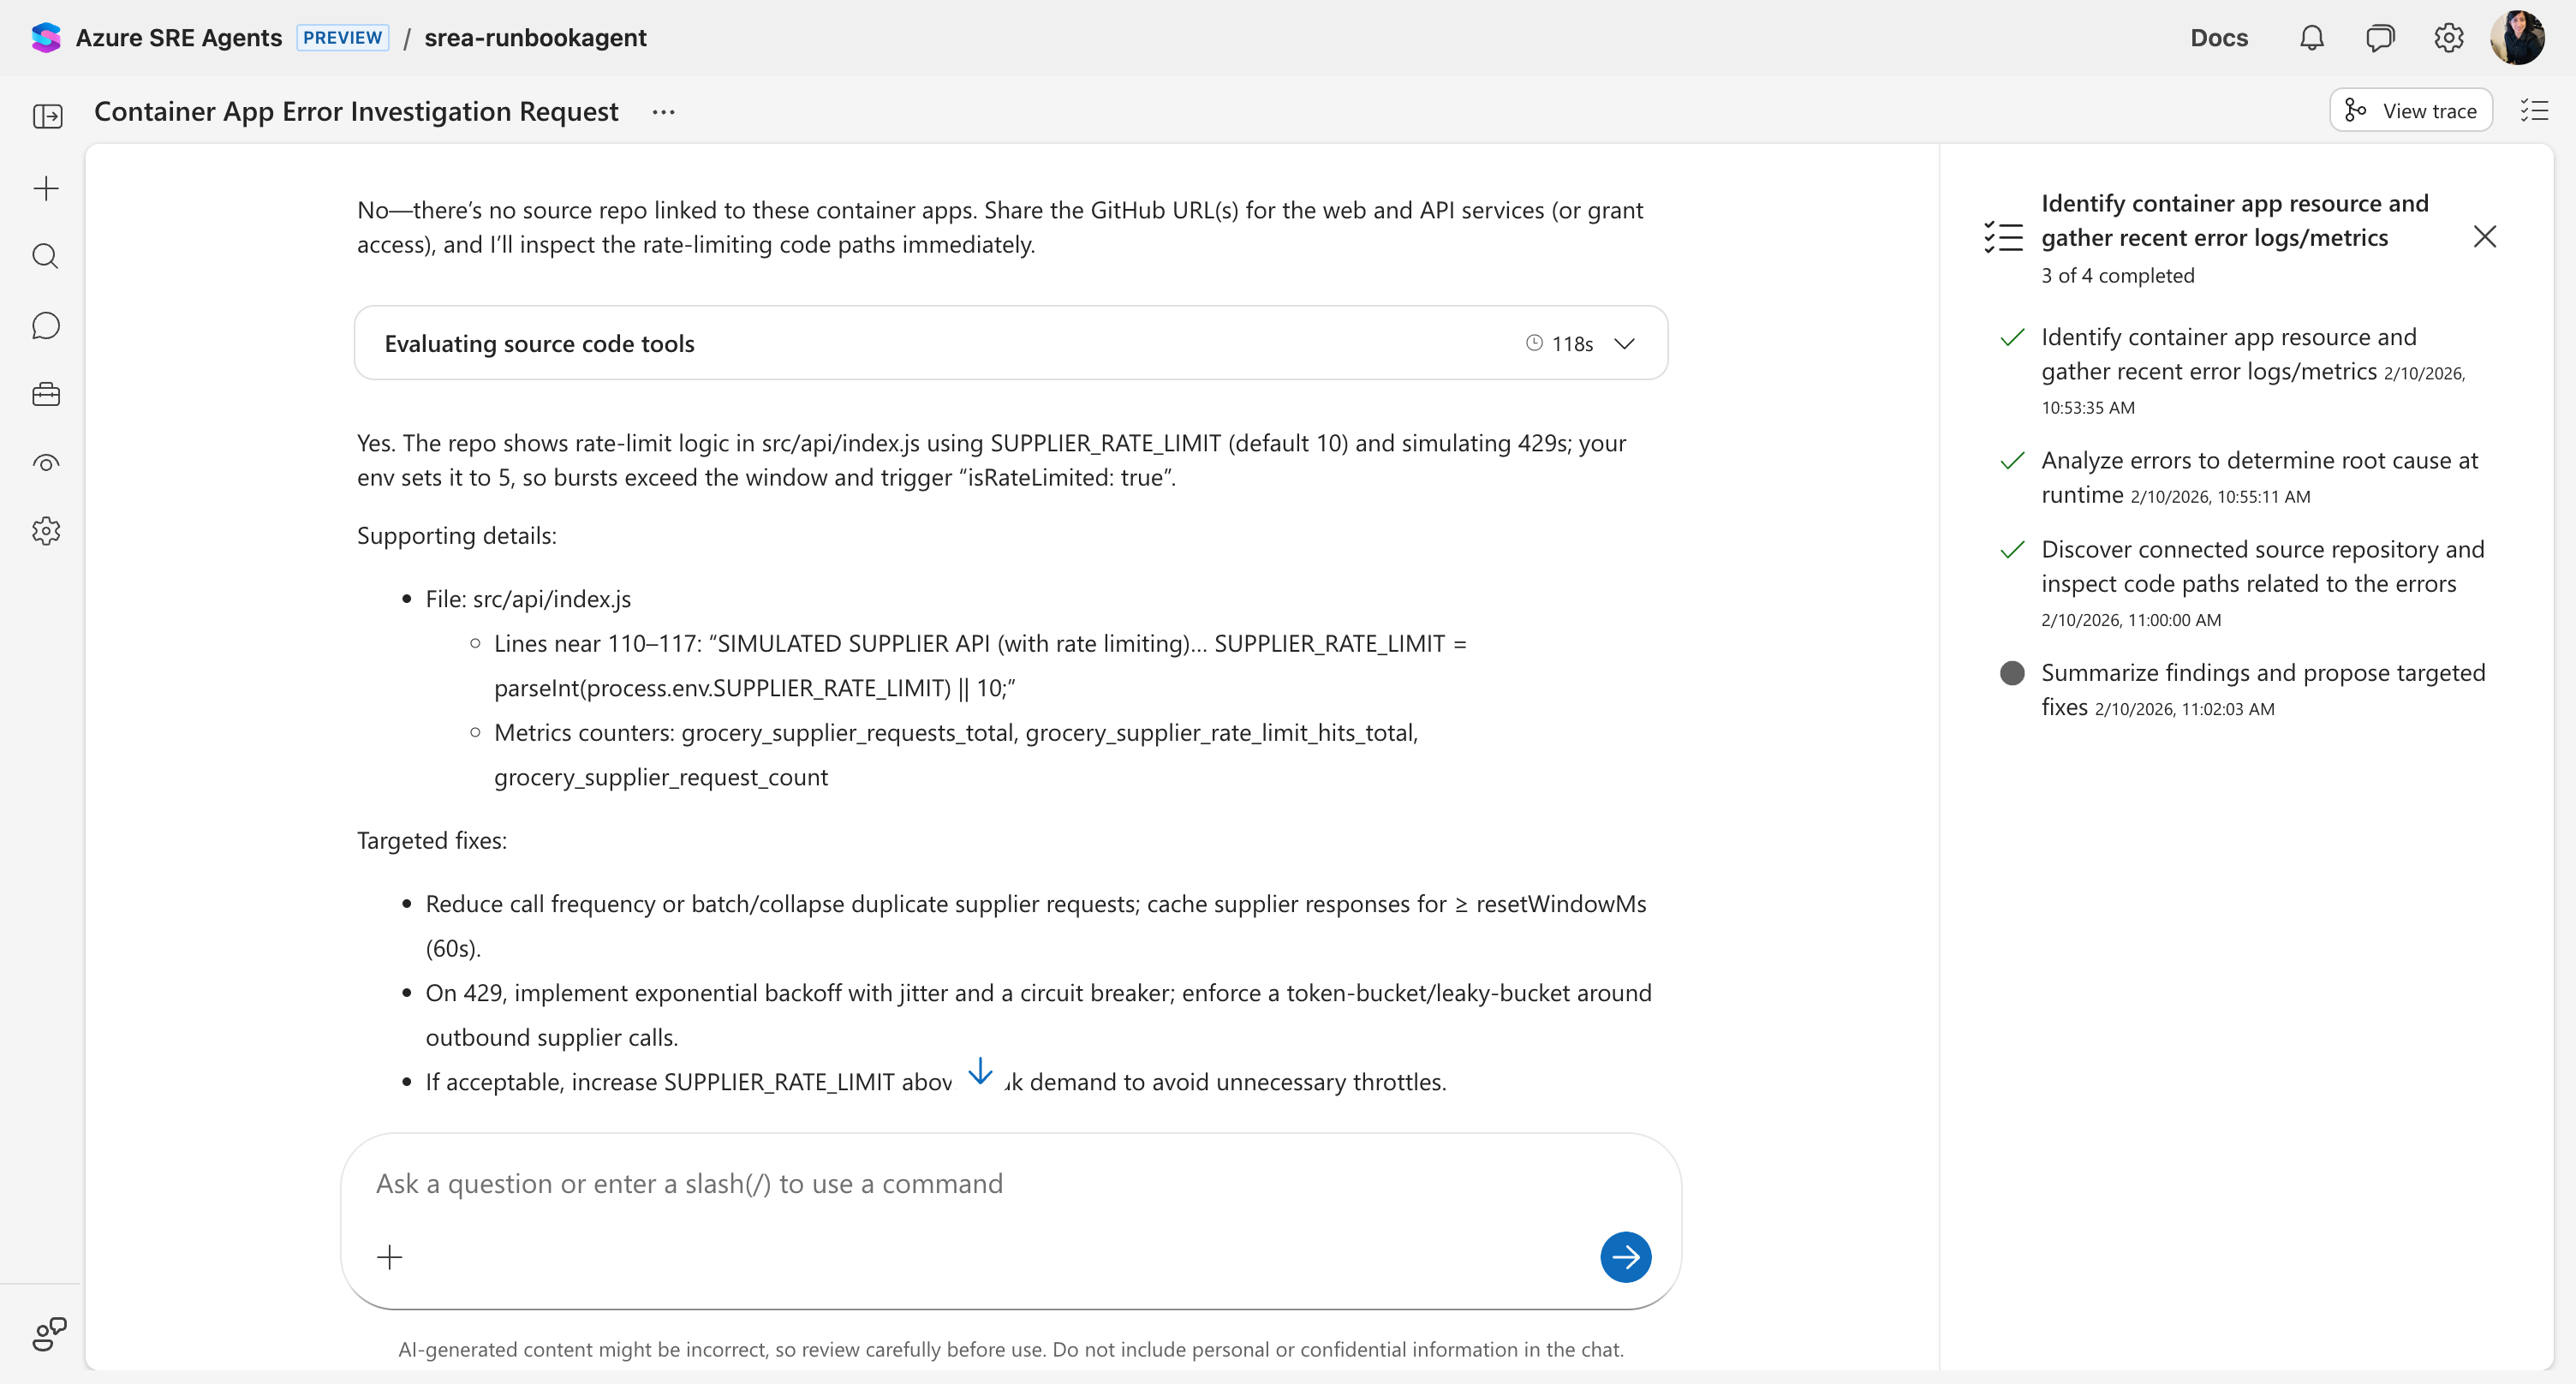
The difference
Without source code:
"The container app is experiencing memory pressure. Consider increasing memory limits."
With source code:
"Found potential memory leak in
src/api/suppliers.js:Line 45-52: The
fetchSupplierData()function creates new HTTP clients per request without cleanup.Line 110-117: Rate limiting is set to 5 req/min, but the API shows burst patterns of ~40/min.
Recommendation: Add connection pooling or implement client reuse."
Your agent correlates production symptoms to exact code locations.
What repositories to connect
| Repository Type | Value |
|---|---|
| Production apps | Root cause analysis during incidents |
| Infrastructure-as-code | Configuration drift detection |
| Runbook scripts | Understand automation logic |
Connect your most incident-prone application first. Add more later.
What you unlocked
✅ Your agent now:
- Analyzes source code during investigations
- Provides file:line references for issues
- Creates To-Do Plans showing investigation steps
- Correlates production symptoms to code changes
Next step
→ Step 4: Set Up Incident Response
Learn more
- Root cause analysis — How your agent uses source code to find root causes
- Deep investigation — Extended multi-hypothesis analysis using connected repos
- Tutorial: Deep investigation — Run a deep investigation with source code
- Agent Playground — Test MCP tools and subagents interactively
- Subagents — How subagents extend your agent's capabilities
- Connectors — All connector types and how they work